Add an image, video, or image gallery in Keynote on Apple Vision Pro
You can add photo and videos to any slide and replace media placeholders with your own media. You can add photos from photo albums on your Apple Vision Pro or insert photos and images from iCloud.
When you show a slide with a video during a presentation, the video plays when you tap anywhere on the slide. You can set video looping and start timing to make the media files play automatically when the slide appears.
Note: Video files must be in a format that QuickTime supports on your Apple Vision Pro. If you can’t add or play a media file, try using iMovie, QuickTime Player, or Compressor on a Mac to convert the file to a QuickTime file (with a .mov filename extension) for video.
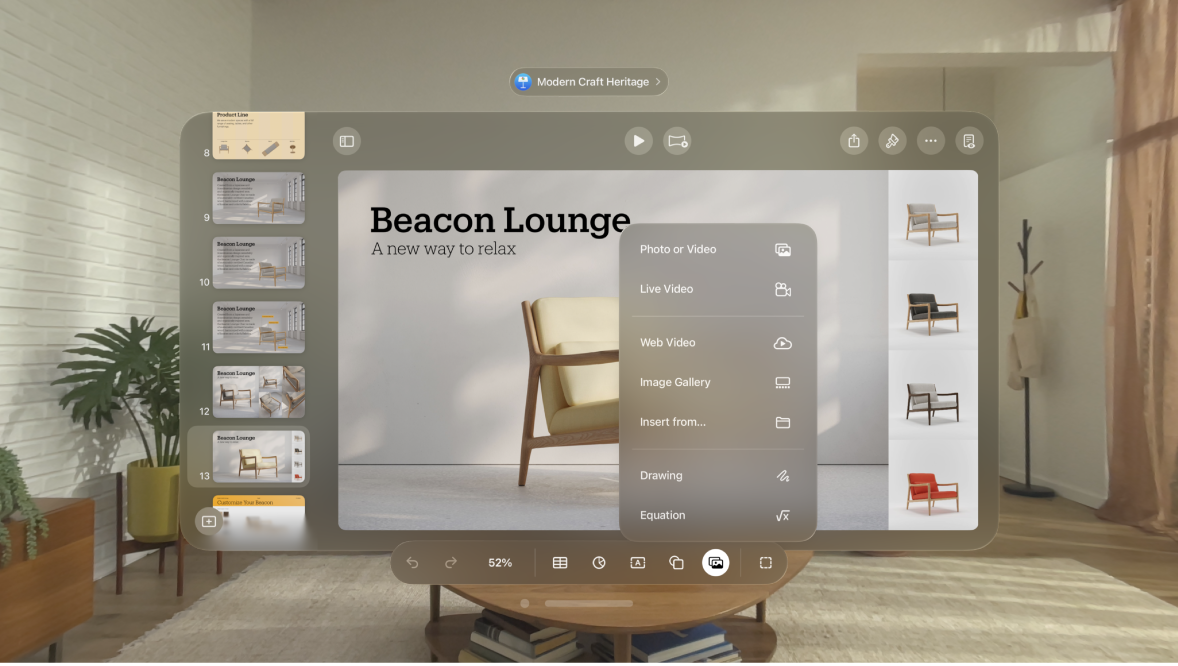
Add an image or video
Tap


Do one of the following:
Add media from your device: Tap Photo or Video, then choose the file you want.
Insert media from iCloud or another service: Tap “Insert from,” then choose the file you want.
Add a video from the web: Tap Web Video, then type or paste a link to the video.
Pinch and drag any blue dot to resize an image, or double-tap to crop it.
Add an image gallery
With an image gallery, you can view a collection of photos in one place on a slide, so only one shows at a time. When you play your presentation, you can cycle through the images before moving to the next slide. A visual effect plays during the transition from one image to the next.
Tap

Pinch and drag the image gallery to reposition it on the slide, or drag any blue dot to resize it.
To add images, tap

To customize the image gallery, make sure it’s still selected, then do any of the following:
Add, reorder, or delete images: Tap


To reorder, pinch and drag

Change the transition between images: Tap

Add an image description that can be used by assistive technology (for example, VoiceOver): Tap

To add descriptions to other images in the gallery, tap the left or right arrow below the text box.
To navigate through the image gallery, tap


To remove an image, tap 
Replace a media placeholder
Tap

Tap Photo or Video, then choose the file you want.
To use a photo from iCloud or another service, tap “Insert from.”
Pinch and drag any blue dot to resize the image.
Set video to loop
Tap the video on the slide to select it, then tap

To set when the video starts playing, select an option:
Start on Tap: Turn on this option to start playing video when you tap the slide. Turn it off to play video automatically when the slide appears.
Play Across Slides: Turn on this option to play the video continuously through multiple slide transitions (even if you change the video’s size and position between consecutive slides). Turn it off to restart the video when a new slide appears.
To have the video repeat until you advance the slide, select an option:
Play in a continuous loop: Tap Loop.
Play forward and then backward: Tap Back & Forth.
Remove the background or a color from a photo
You can remove a background or color from an image with the Remove Background tool.
Tap the image to select it, tap

Pinch and drag over the color you want to remove.
As you drag, the mask selection grows to include areas that use similar colors.
To refine your selections, do any of the following:
Remove another color: Pinch and drag over the color.
Undo all changes: Tap Reset in the controls.
Tap Done.
Add an accessible media description
You can add a description to any media in your presentation. Descriptions are read by assistive technology (for example, VoiceOver) when someone uses that technology to access your presentation, but they aren’t visible anywhere in your presentation.
Tap the media to select it, then tap

Tap Description, then tap in the text box and enter your text.
If Description isn’t visible, you may need to tap a tab that corresponds with your media type, like Movie or Drawing.
If you export your presentation as a PDF, descriptions are still readable by assistive technology. See Export Keynote presentation in another format.
