Install MPX Modules in Mac Pro
Follow these steps to install MPX Modules in your Mac Pro. MPX Modules must be installed in PCIe expansion slots 1 and 3.
Important: Each PCIe slot is rated a maximum of 75 W; Each 6-pin auxiliary (AUX) connector is rated 75 W, and each 8-pin AUX connector is rated 150 W. Only install PCIe modules that specifically state that they are compliant with the industry standard PCIe specification. Use of noncompliant modules may not keep different input power sources separated, resulting in a possible burn hazard, and may damage the computer.
Note: If you have a Mac Pro rack workstation, see Install MPX Modules in Mac Pro.
Turn off your Mac Pro by choosing Apple menu
 > Shut Down.
Let your Mac Pro cool down for 5 to 10 minutes before you touch the internal components, which may be hot.
Disconnect all cables except the power cord from your Mac Pro.
Touch the metal on the outside of your Mac Pro to discharge any static electricity.
Note: Always discharge static before you touch parts or install components inside your Mac Pro. To avoid generating static, don’t walk around the room until you finish installing the MPX Modules.
Disconnect the power cord.
Unlock the housing by rotating the latch counterclockwise 90 degrees.
WARNING: Do not rotate the latch while Mac Pro is turned on; doing so may cause it to shut down.


Remove the housing by pulling it up by the latch.
Note: Mac Pro won’t start up when its housing is removed.

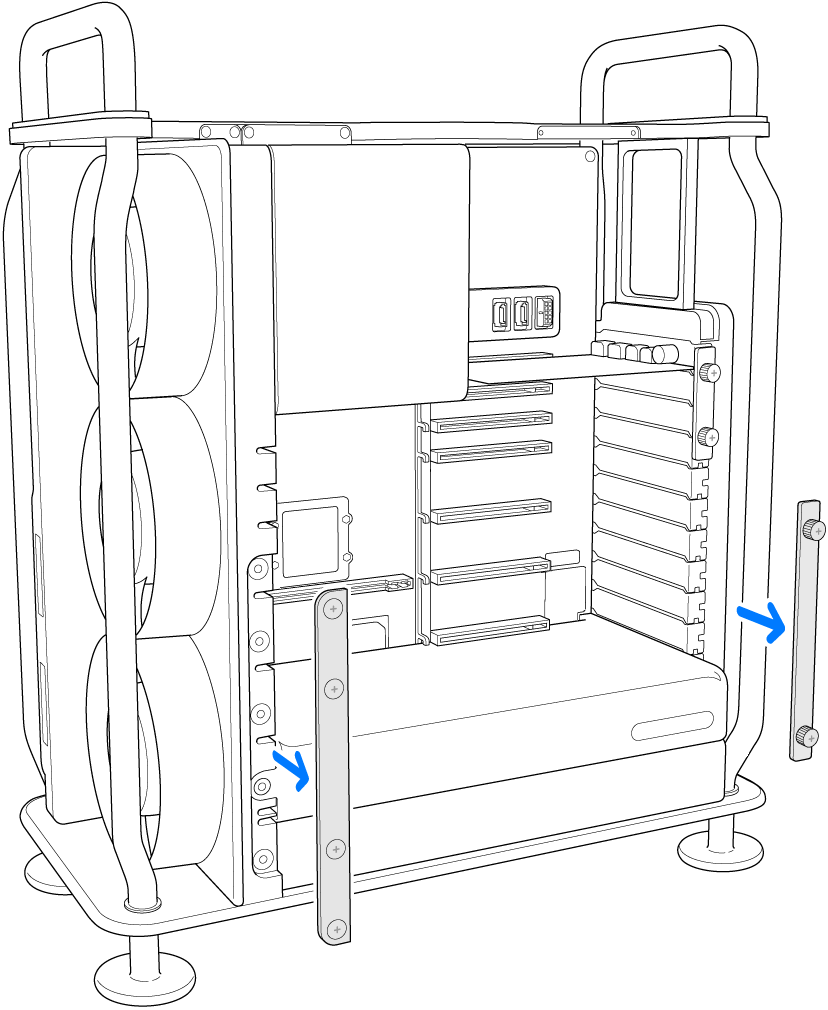
Remove the clamp plates (numbered 1 and 3) using a Phillips #1 screwdriver.
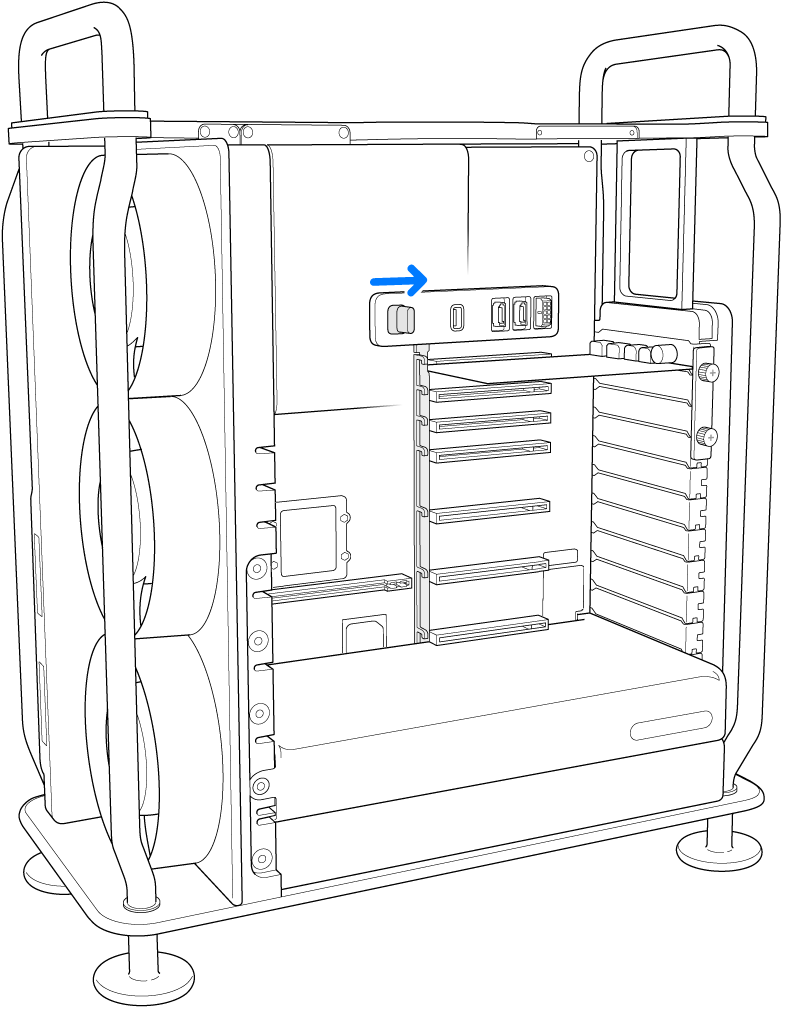
Slide the PCI retention latch (numbered 2) to the right.
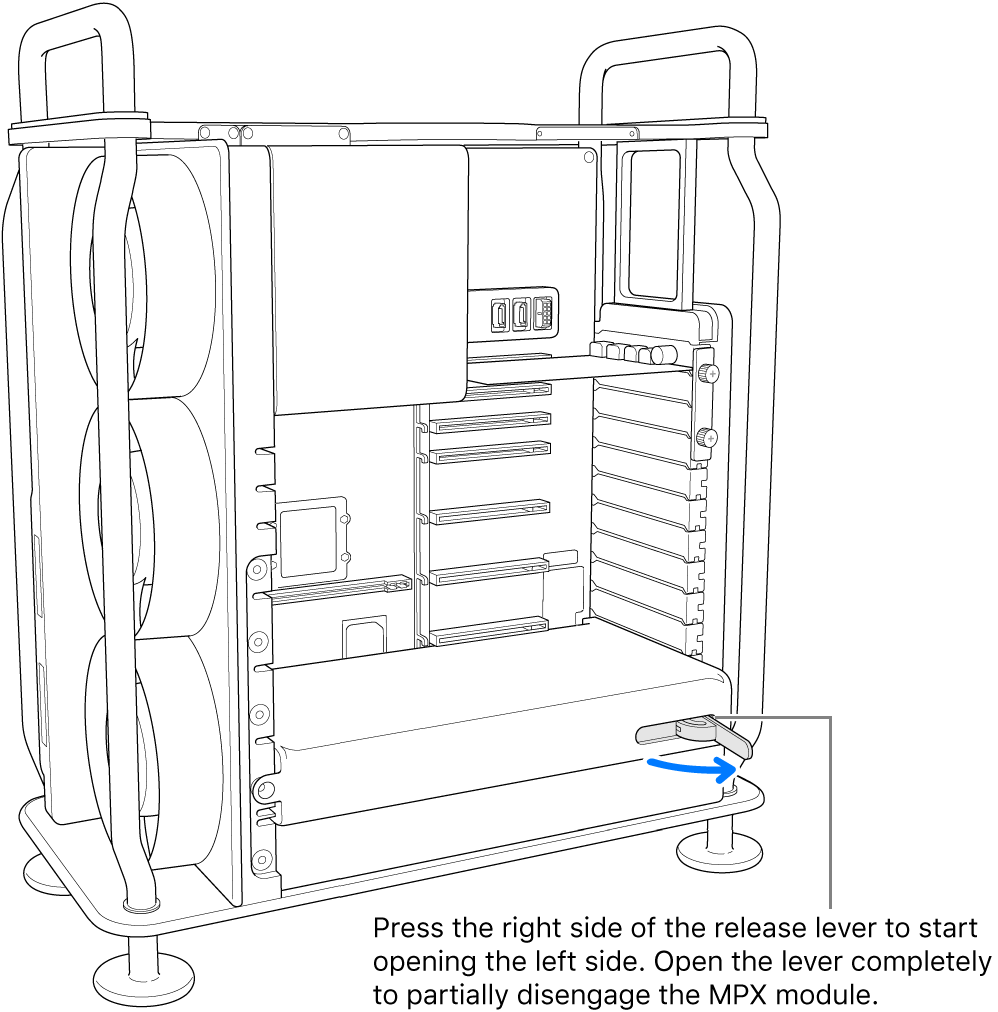
Use the release lever (numbered 4) to remove the existing module.
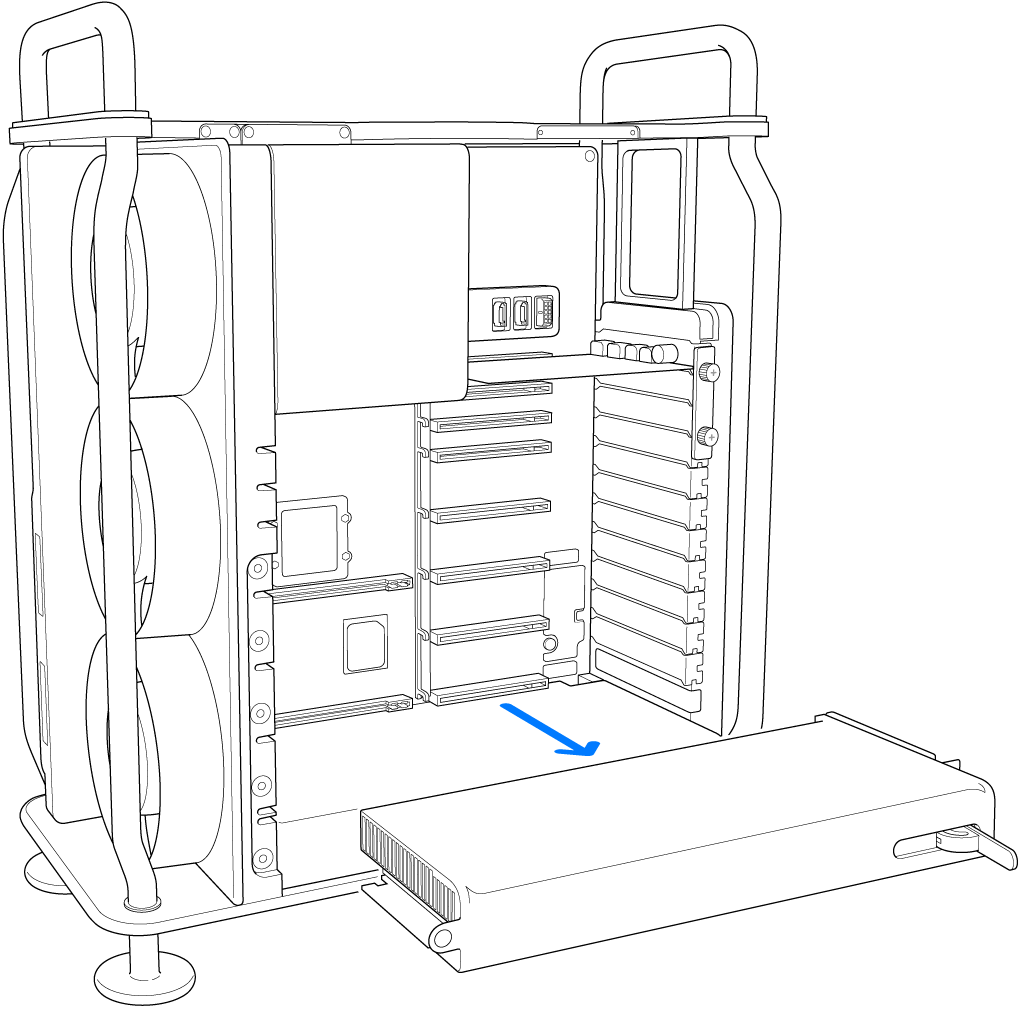
Remove the existing module.
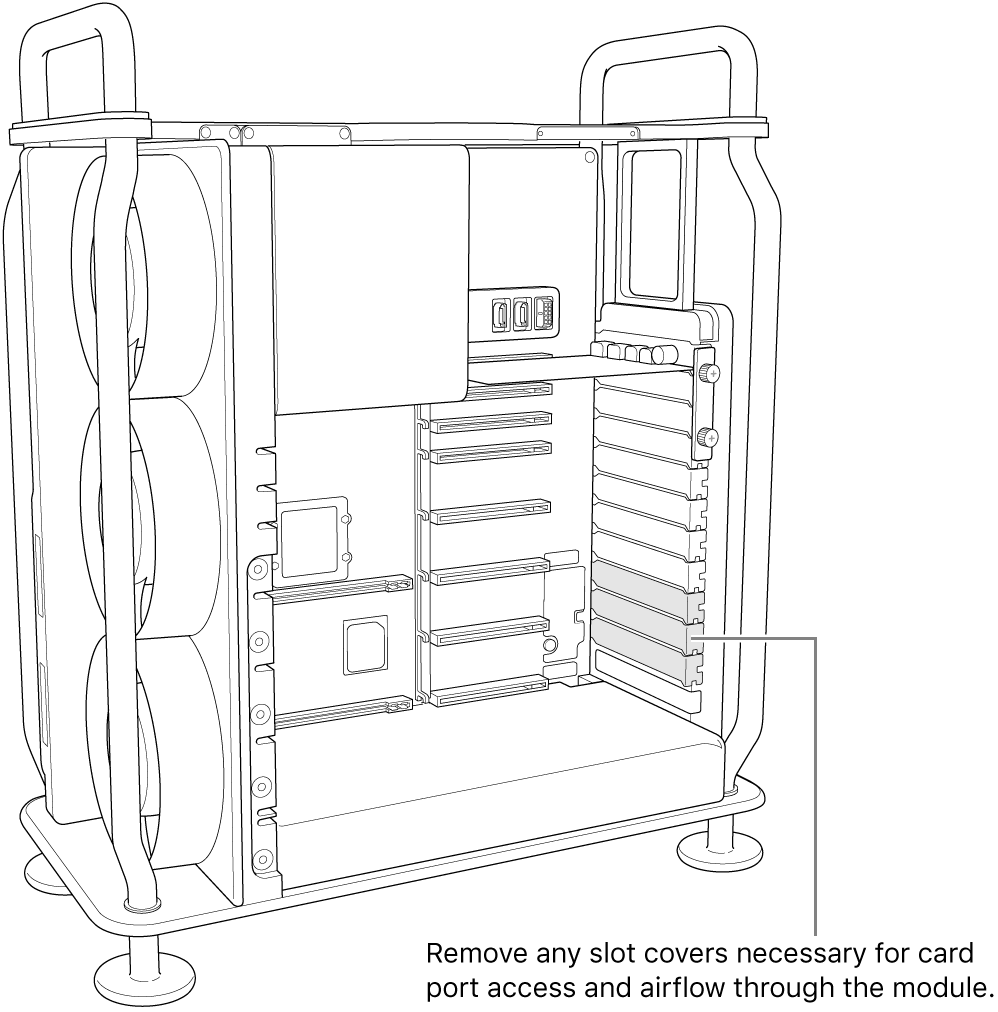
Remove the slot covers, if necessary.
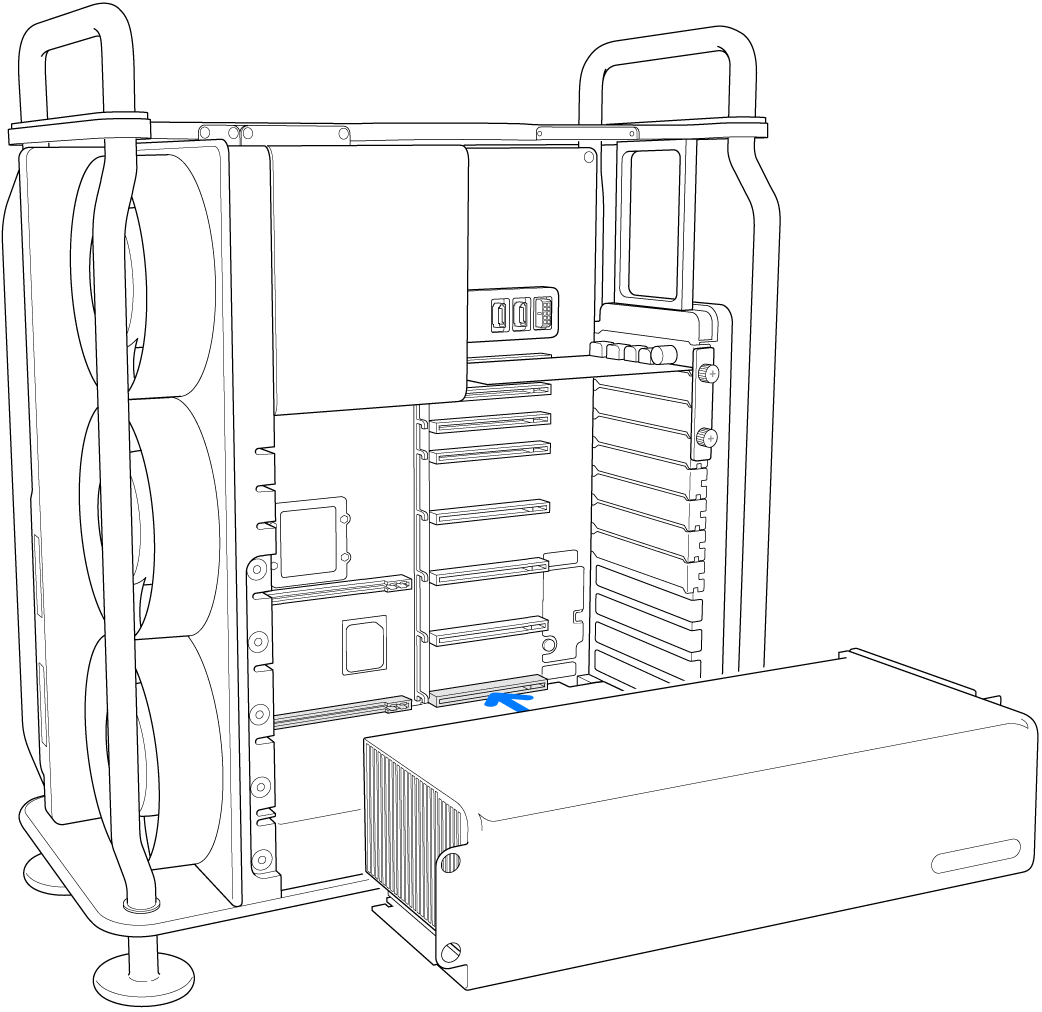
Push the ejection arm on the new module, then push the module into place.
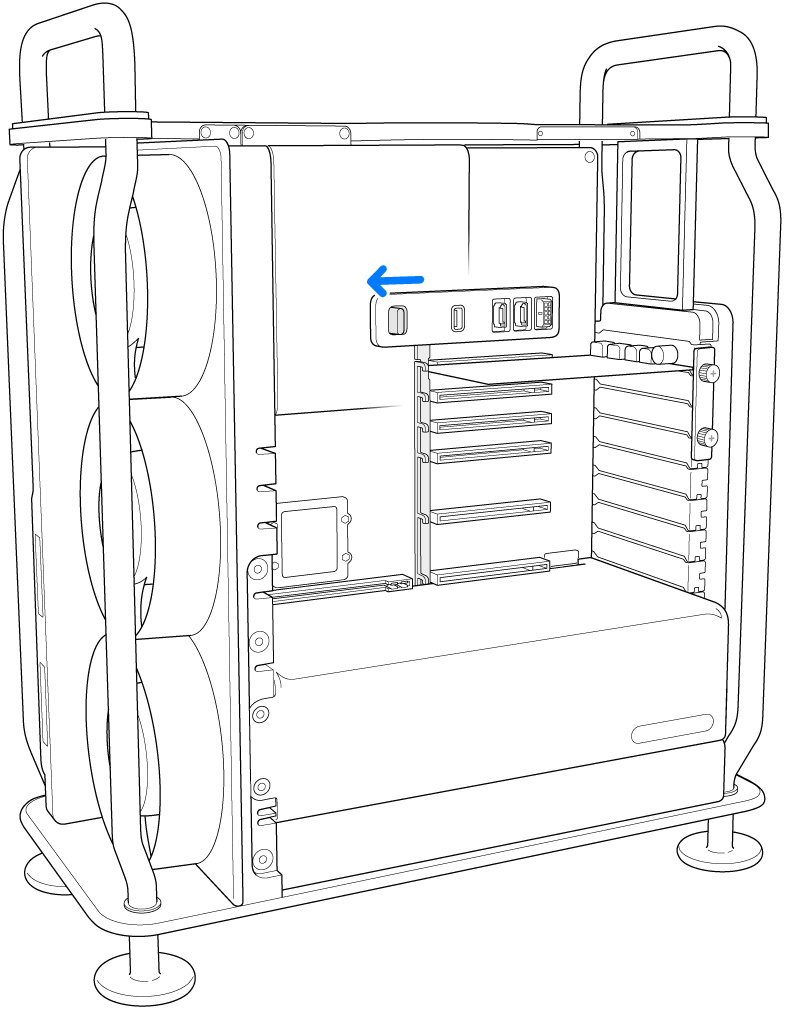
Slide the PCI retention latch (numbered 2) to the left.
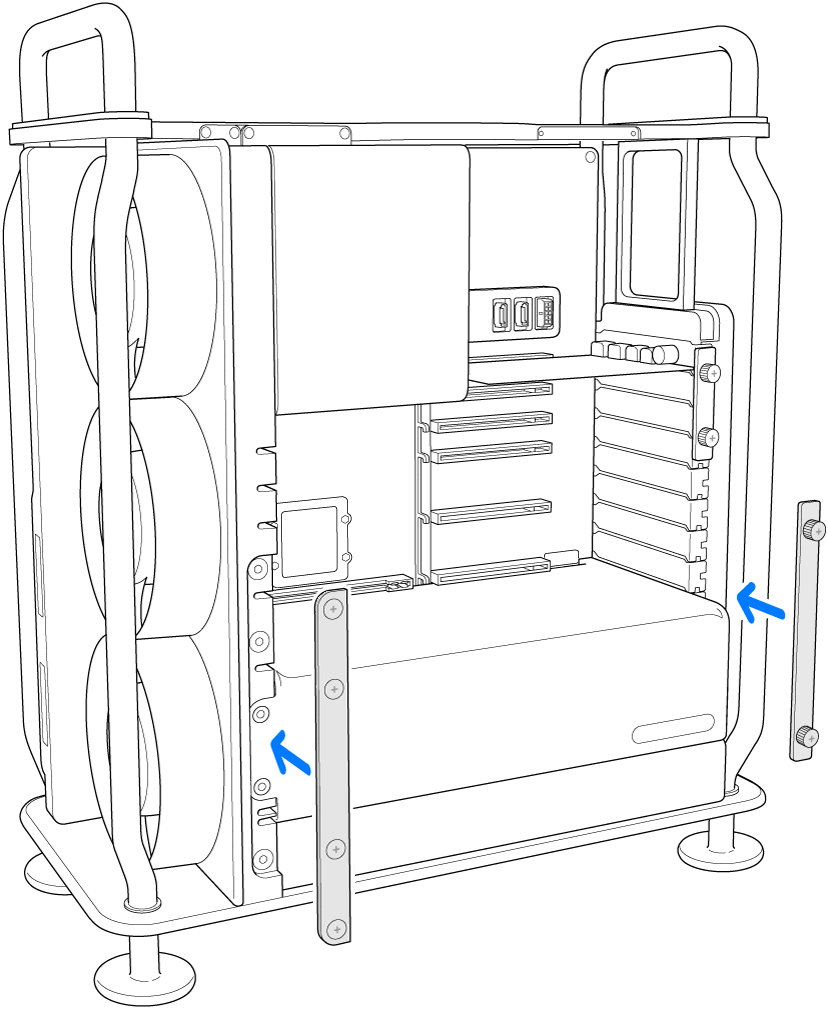
Reinstall the clamp plates (numbered 1 and 3).
If you have two matching MPX modules that support Infinity Fabric Link, install the included bridge board (it’s specific to the GPU of the modules). First, remove the cap from each module. Make sure the bridge is unlocked (see instructions on the bridge). Align the bridge, push down to connect to the modules, and turn the attachment screws clockwise a quarter turn to secure the connection.
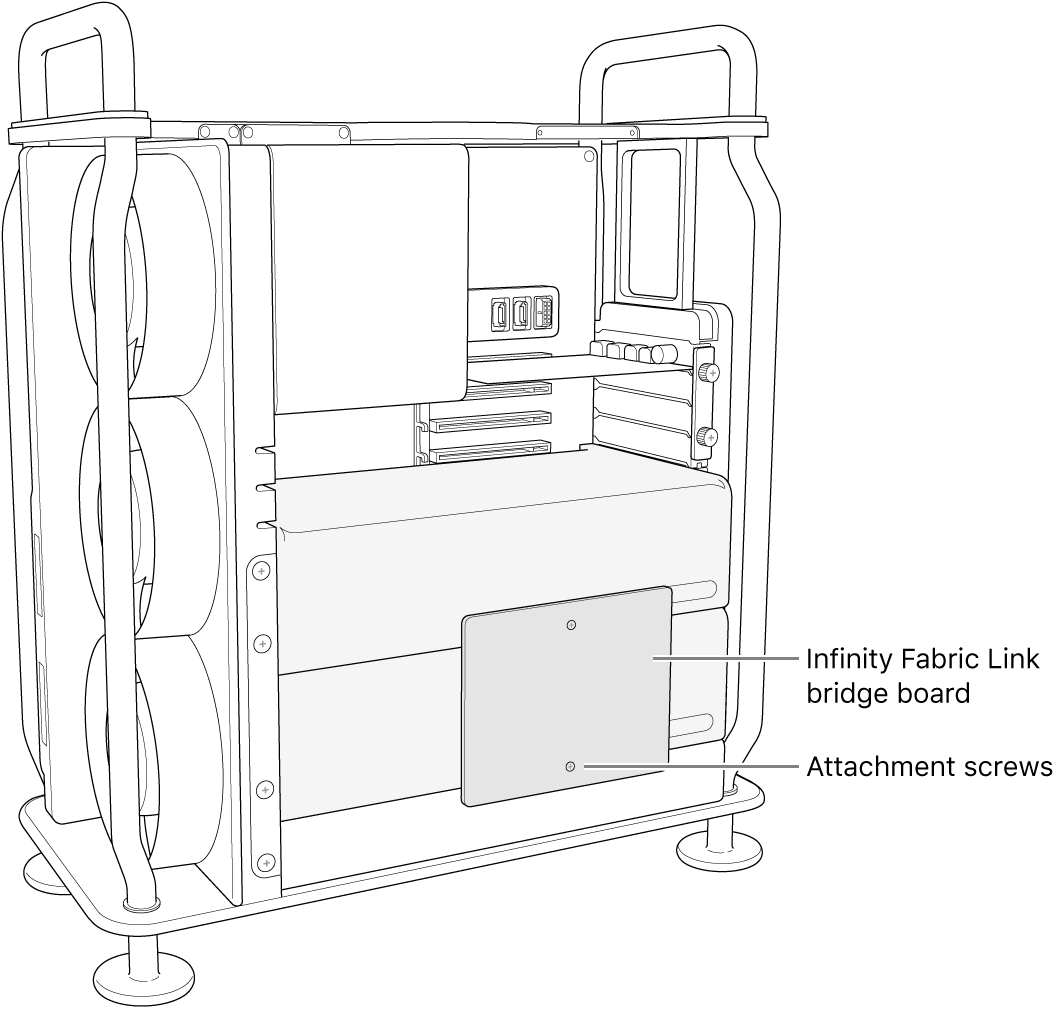
Replace the computer’s housing, then turn the latch clockwise 90 degrees to lock it.
The computer will not turn on if the housing has not been replaced and the latch rotated to its original position.
Reconnect all cables and the power cord to your Mac Pro.
