Install Memory in Mac Pro
Follow these steps to install memory in your Mac Pro.
Memory must be installed according to the diagrams printed on the inside of the DIMM covers—failure to do so may result in your Mac Pro not starting up. For more information, see the Apple Support article Install and replace memory in your Mac Pro.
Note: If you have a Mac Pro tower workstation, see Install Memory in Mac Pro in Mac Pro Essentials for Mac Pro (Tower).
Turn off your Mac Pro by choosing Apple menu
 > Shut Down.
Let it cool down for 5 to 10 minutes before you touch the internal components, which may be hot.
Disconnect all cables except the power cord from your Mac Pro.
Touch the metal on the outside of your Mac Pro to discharge any static electricity.
Note: Always discharge static before you touch parts or install components inside your Mac Pro. To avoid generating static, don’t walk around the room until you finish installing the memory.
Disconnect the power cord.
Remove Mac Pro from the rack and place it upright.
Stand the computer on its end.
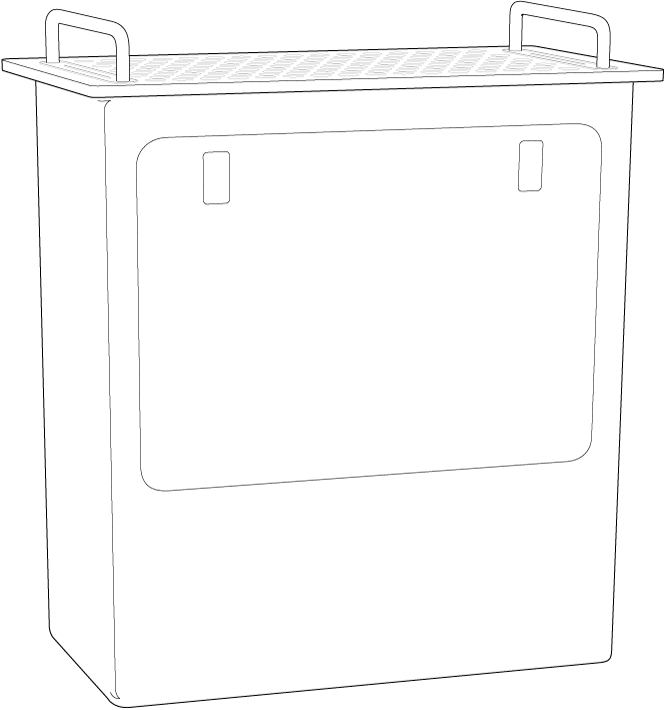
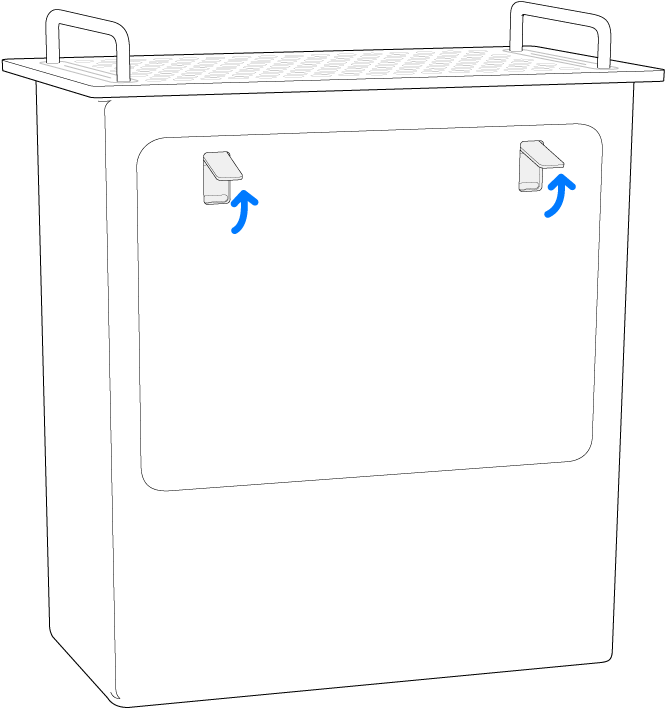
Pull the latches, then remove the access door.
Slide the DIMM cover switch.
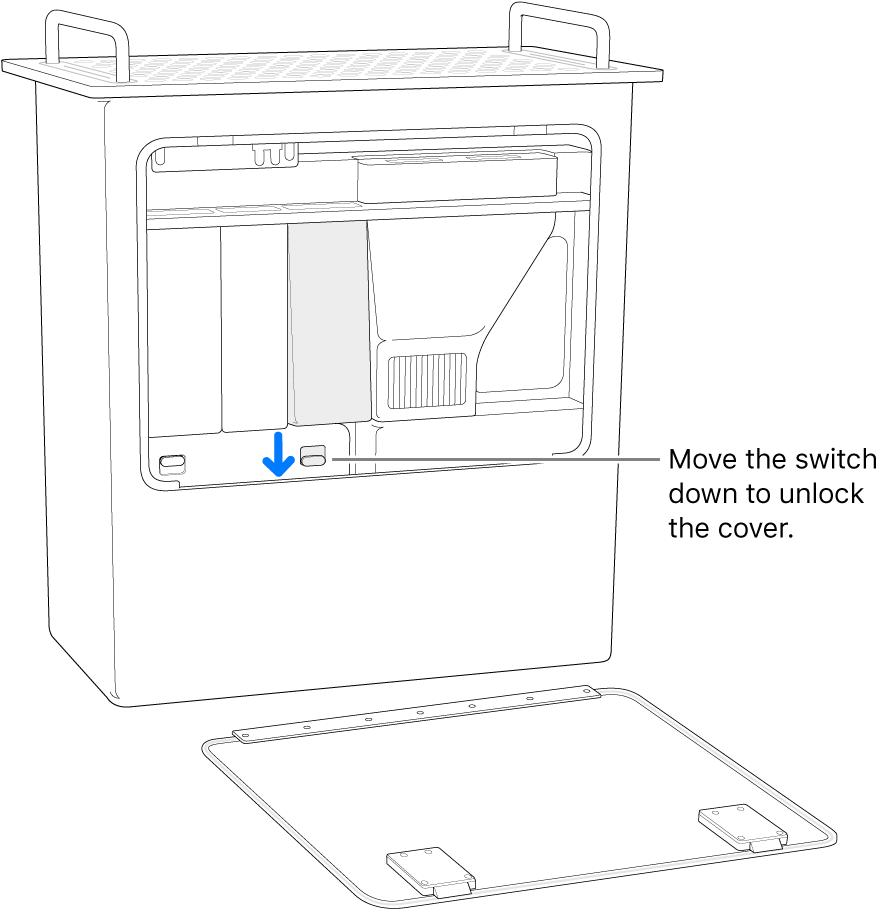
Remove the DIMM covers.
Remove the new DIMM from its static-proof bag and hold it by its corners. Don’t touch the gold connectors or the components on the DIMM.
Push the DIMM into the slot. The DIMM is installed when the ejectors click closed.
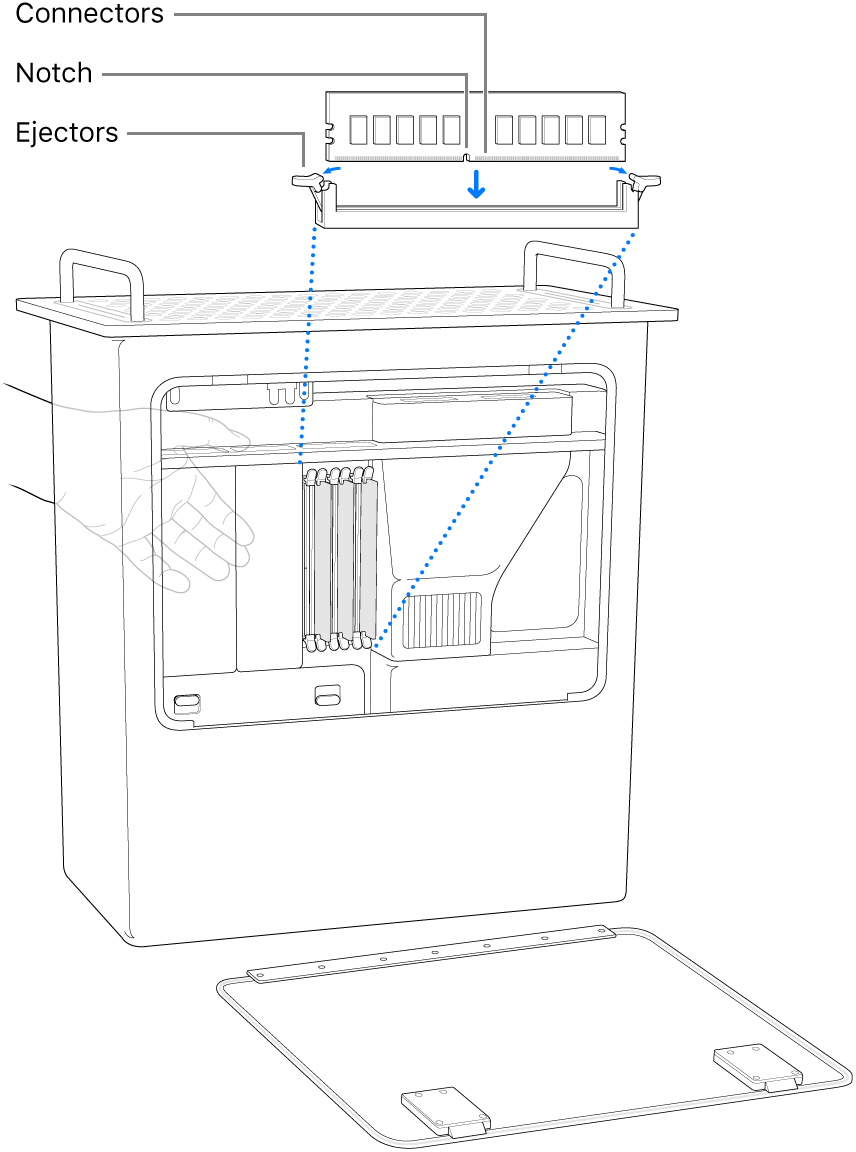
Reinstall the DIMM covers; the DIMM cover switch automatically locks.
Note: It’s important to reinstall the DIMM covers in order to maintain the performance of your Mac Pro.
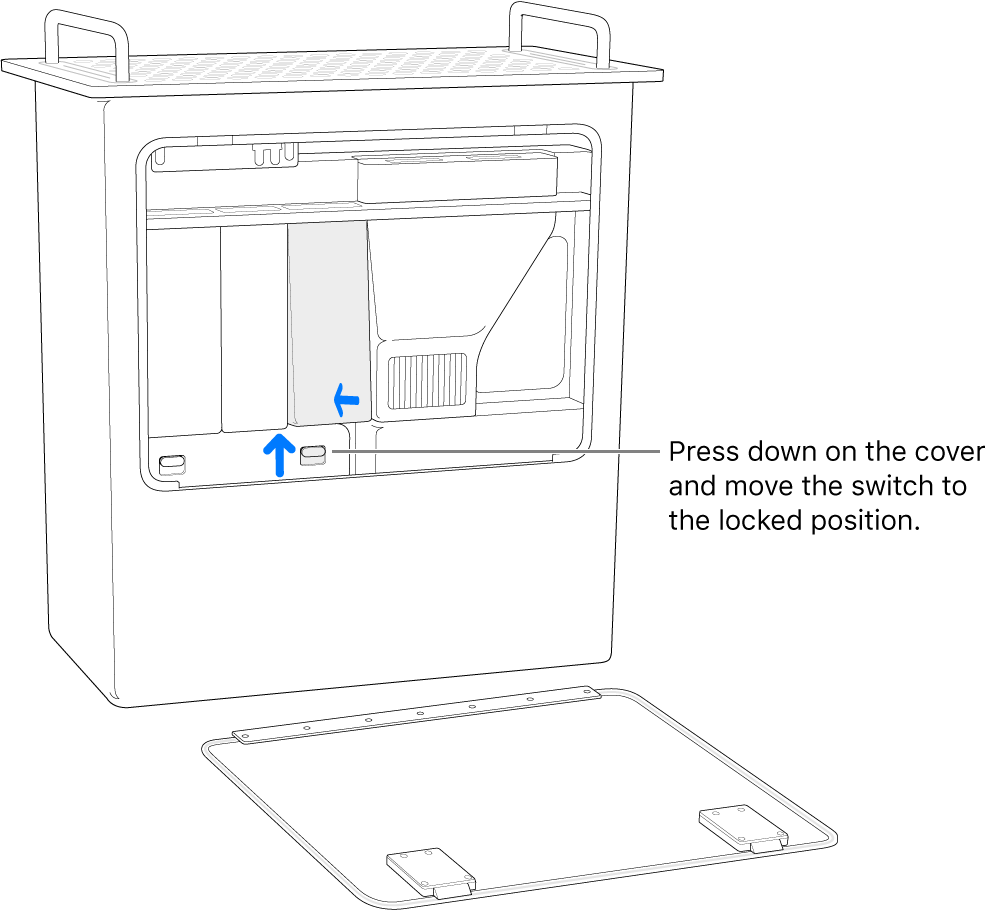
Reinstall the side door.
Reinstall Mac Pro back into the rack.
Reconnect all cables and the power cord to your Mac Pro.
