Uninstall and install SSD modules in Mac Pro
Follow these steps to uninstall and install SSD modules in your Mac Pro. To perform this process, you must have:
Apple Configurator 2.12 or later installed on any Mac that supports macOS Catalina 10.14.6 or later, is plugged into a power source, and has internet access. See the Apple Support article macOS Catalina is compatible with these computers.
You may need to configure your web proxy or firewall ports to allow all network traffic from Apple devices to Apple’s network 17.0.0.0/8. For more information on the ports used by Apple products, see the Apple Support article Use Apple products on enterprise networks.
A supported USB-C to USB-C charge cable
The USB-C cable must support both power and data. Thunderbolt 3 cables aren’t supported.
WARNING: Make sure all data from the existing SSD has been backed up. Once a new SSD pairing operation has started, the data on the existing SSD is not recoverable.
Note: If you have a Mac Pro rack workstation, see the rack version of Uninstall and install SSD Modules in Mac Pro.
Turn off your Mac Pro by choosing Apple menu
 > Shut Down.
Let the computer cool down for 5 to 10 minutes before you touch the internal components, which may be hot.
Disconnect all cables except the power cord from your Mac Pro.
Touch the metal on the outside of your Mac Pro to discharge any static electricity.
Note: Always discharge static before you touch parts or install components inside your Mac Pro. To avoid generating static, don’t walk around the room until you finish installing the expansion cards.
Disconnect the power cord.
Unlock the computer’s housing by rotating the latch counterclockwise 90 degrees.
WARNING: Do not rotate the latch while the computer is turned on; doing so may cause the computer to shut down.


Remove the computer’s housing by pulling it up by the latch.
Note: Mac Pro will not start up if its housing is removed.

Place Mac Pro on its side, on a non-scratch surface.
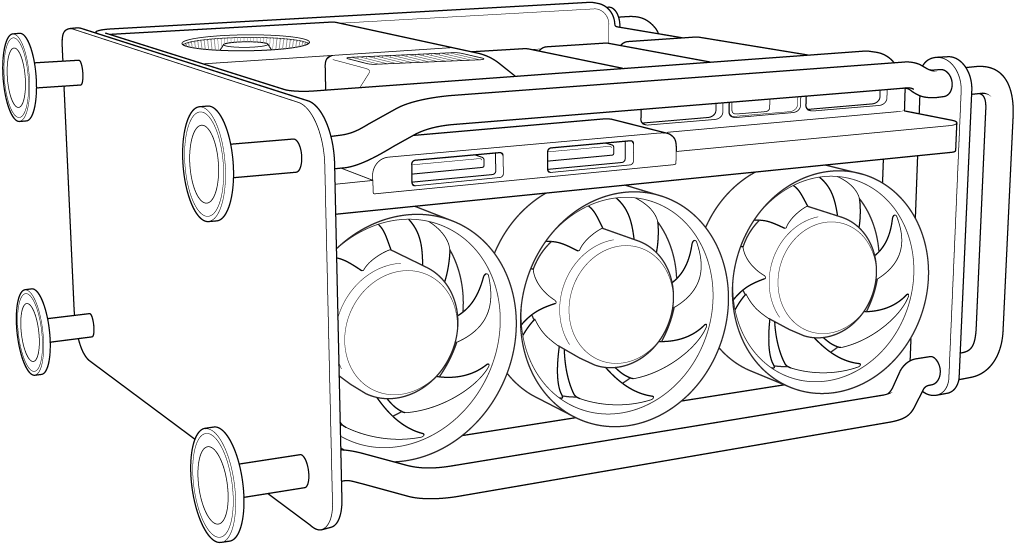
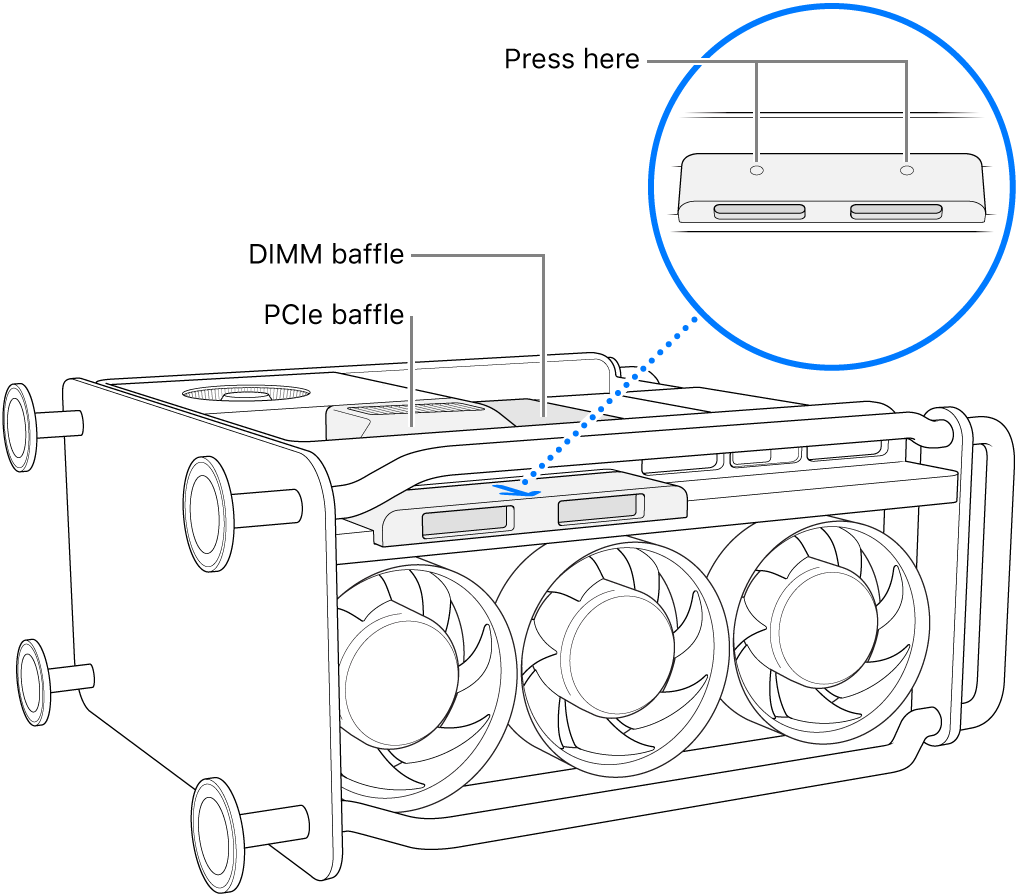
Push down on the SSD cover, then slide it out.
Note: On some Mac Pro computers, you may need to remove the lower DIMM baffle, then push in the SSD cover. Once the PCIe baffle pops up, pull out the SSD cover.
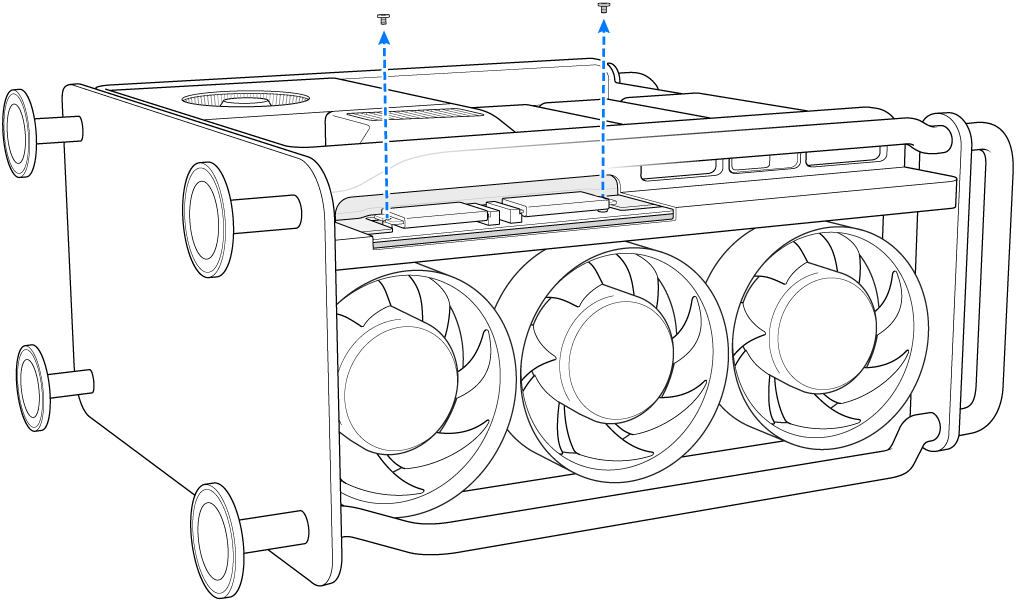
Use a T8 screwdriver to remove the two screws.
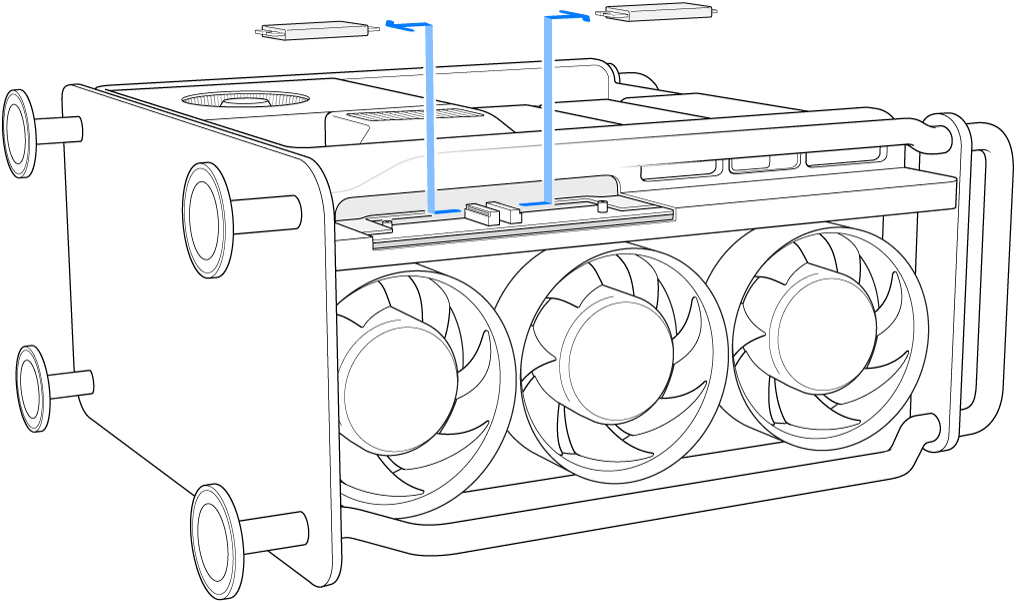
Pull an SSD module straight out. Repeat with the other module.
Slide the new modules into place, making sure to place each module in the correct socket.
Important: The modules are marked “1” and “2”. The module marked “1” must be installed in the socket marked “1” and the module marked “2” must be installed in the socket marked “2”.
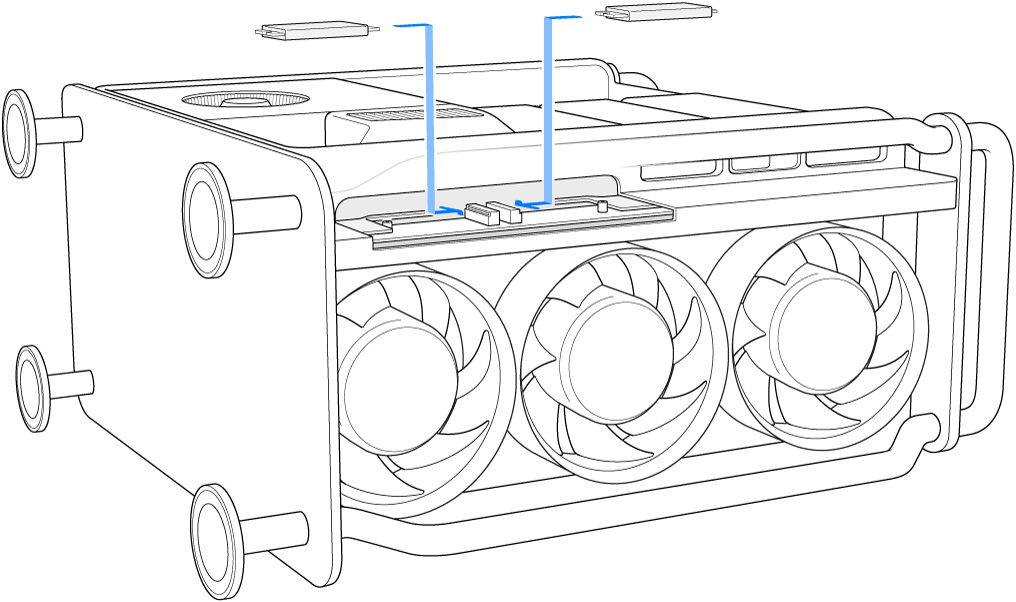
Use a T8 screwdriver to install the two screws that came with the new modules.
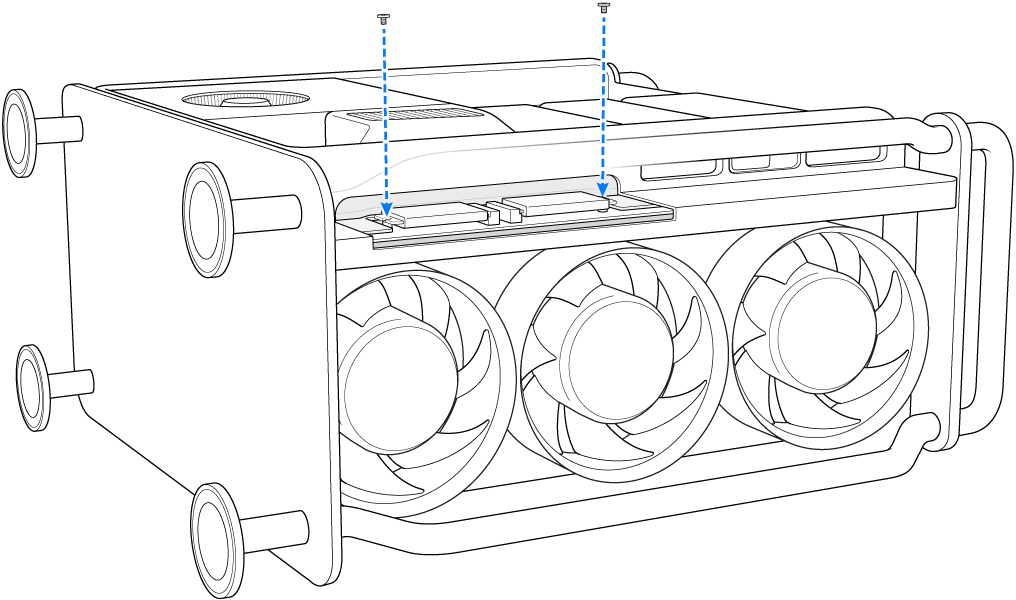
Push in the SSD cover. You may also need to lift the PCIe baffle to properly seat the SSD cover.
Important: Make sure the SSD cover and baffle are flush with the surrounding components.
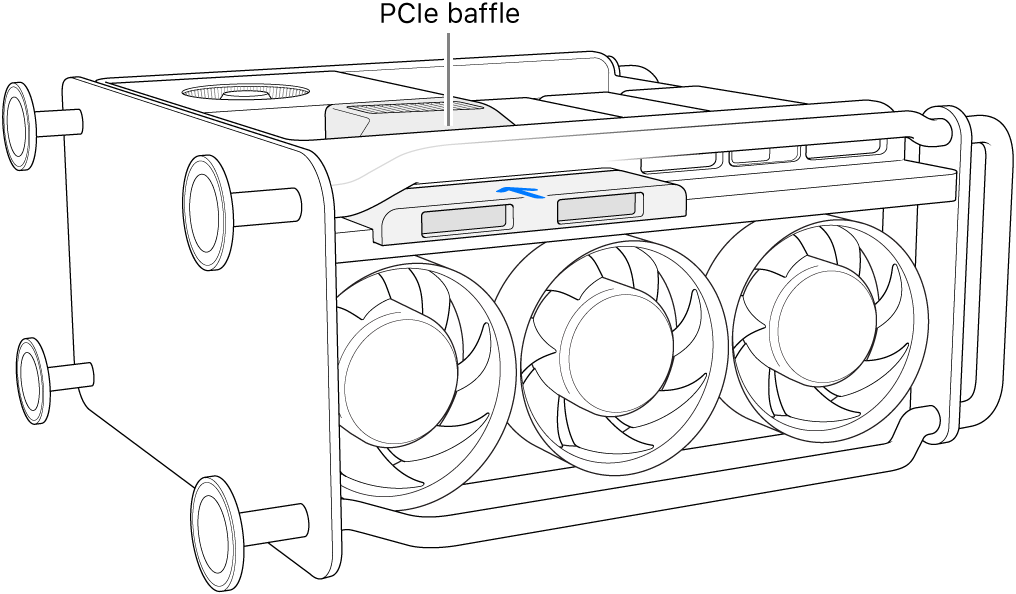
Place Mac Pro upright on its feet or wheels, slide the housing over the computer, then turn the latch clockwise 90 degrees to lock the housing.
The computer will not turn on if the housing has not been replaced and the latch rotated to its original position.
Reconnect all cables, except the power cord, to your Mac Pro.
Plug in a monitor so you can see when the process of restoring the firmware is complete.
Plug the USB-C cable into the Thunderbolt port farthest away from the power button. Plug the other end of the cable into the Mac that you will use to restore Mac Pro.
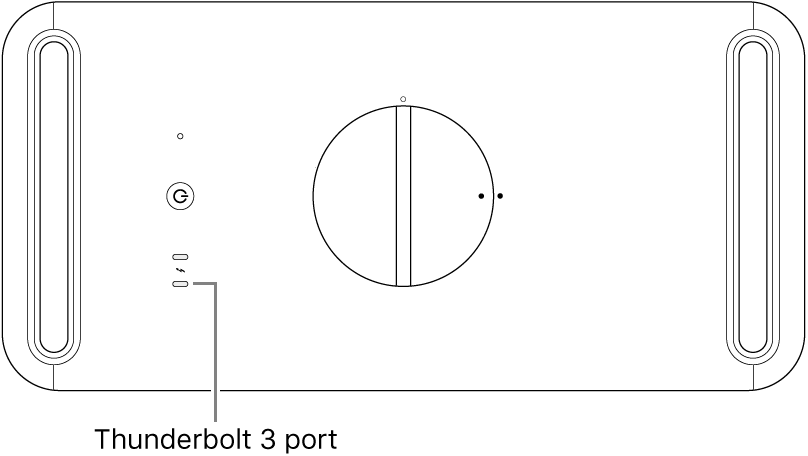
While holding down the power button, connect Mac Pro to power and continue to hold down the power button for about 3 seconds.
Note: You won’t see any screen activity from Mac Pro.
To restore the firmware on Mac Pro, follow the steps outlined in Restore the firmware on the Apple T2 Security Chip and erase the internal flash storage in a Mac in the Apple Configurator 2 User Guide.
