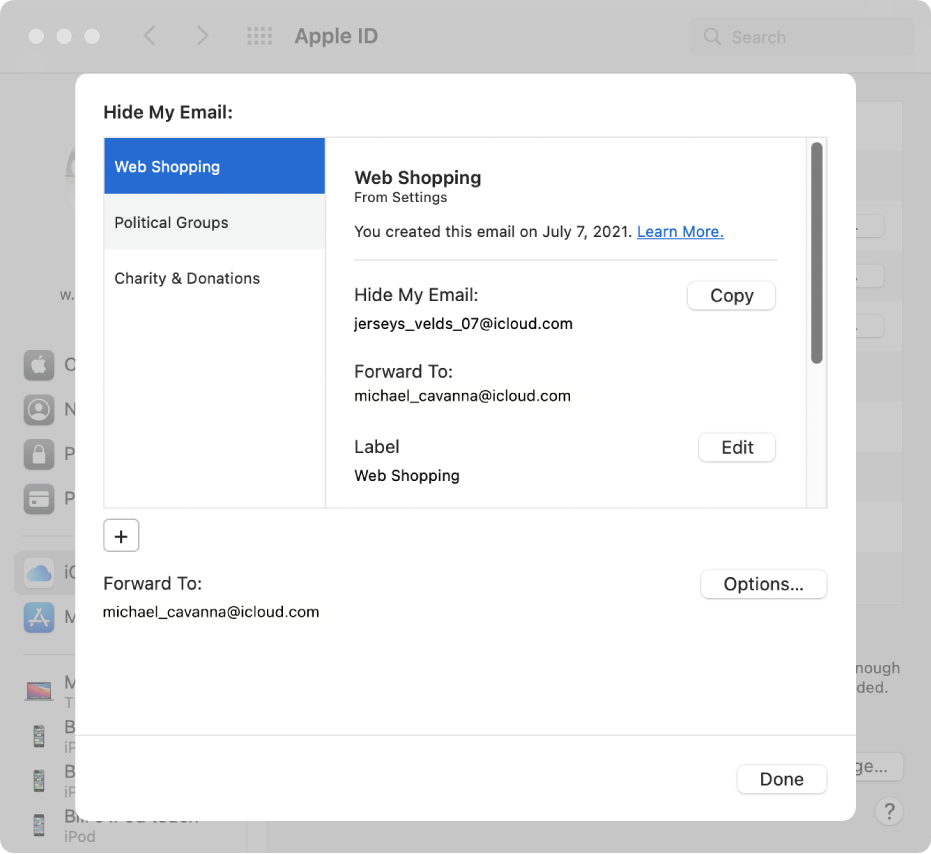
Use Hide My Email on Mac
With Hide My Email, you can generate unique, random email addresses that forward to your personal email account, so you don’t have to share your real email address when filling out a form on the web or signing up for a newsletter. You can choose to forward emails to your iCloud Mail address or any email address associated with your Apple ID.
On the Mac, email addresses that you create with Hide My Email are available in Safari and in Mail. See Hide your personal email address in Safari and Use Hide My Email in Mail.
With Hide My Email, you can also set up and use random forwarding email addresses in iCloud preferences. Go to Apple menu 
To set up Hide My Email across all your iOS and iPadOS devices and on iCloud.com, see Set up and use Hide My Email in iCloud+ on all your devices.
You can subscribe to iCloud+ or to Apple One, which includes iCloud+ and other services. See the Apple Support article Bundle Apple subscriptions with Apple One.
Note: iCloud+ features aren’t available in all countries or regions. See the Apple Support article Availability of Apple Media Services.
Set up email addresses with Hide My Email
On your Mac, choose Apple menu

 , then select iCloud in the sidebar.
Next to Hide My Email, click Options.

If requested, enter your Apple ID password and click Continue.
Click Set Up.
If requested to upgrade to an iCloud+ plan, click Choose and select a plan.
Click Create New Address.
The Hide My Email window opens and displays a randomly created iCloud email address.
Click Continue.
Enter a label for your email and a note to help you remember how you use this email address, then click Continue.
When the Hide My Email window appears, click the Add button
 to create and label new email addresses.
When you’re finished, click Done.
Manage addresses created with Hide My Email
With Hide My Email, you can create email addresses whenever you need one on a website. Your addresses are available in Safari on your Mac and other devices signed in with your Apple ID.
In Hide My Email preferences, you can copy an address, change labels, create new addresses, deactivate or delete addresses, and select the personal email address you want email forwarded to.
On your Mac, choose Apple menu

 , then select iCloud in the sidebar.
Next to Hide My Email, click Options.

If requested, enter your Apple ID password and click Continue.
When the Hide My Email window appears, do any of the following:

Copy an email address created with Hide My Email to paste into a web form or application: Select an address on the left, then click Copy. Make Safari or another browser or internet app active, then paste email address into the email account field.
Create an email address: Click the Add button
 , enter a label name and note, then click Continue.
Edit an email address label: Select an address on the left, click Edit, make changes to the label, then click Done.
Edit an email address note: Select an address on the left, scroll in the list on the right until the Note option appears, click Edit, enter a note, then click Done.
Deactivate an email address created with Hide My Email: Select an address on the left, scroll in the list on the right until the Deactivate Email Address button appears, click Deactivate Email Address, then click Deactivate.
Reactivate an inactive email address: Beside Inactive Addresses, click Options. Select an inactive address in the list on the left, click Reactivate Address, click Done, then click Reactivate.
Delete an inactive email address: Beside Inactive Addresses, click Options. Select an inactive address in the list on the left, click Delete Address, click Done, then click Delete.
Choose which personal email address to forward to: If you have more than one personal email address, click Options, select the address that Hide My Email should forward mail to, then click Done.
Click Done.
For information about iCloud+ features in Safari, see the Safari User Guide.
