Add and format sections in Pages on Mac
In a word processing document, you can divide your document into multiple sections, each of which can have different page numbering, headers, footers or background objects (such as a watermark). You might want to do this, for example, to use section-specific chapter titles in headers or to vary the visual design of a section. Some templates have predefined sections that you can add to or delete.
All sections begin at the top of a new page. You can divide the current section into two sections starting at the insertion point or at the top of the current page. You can also add a new, blank section after the current section.
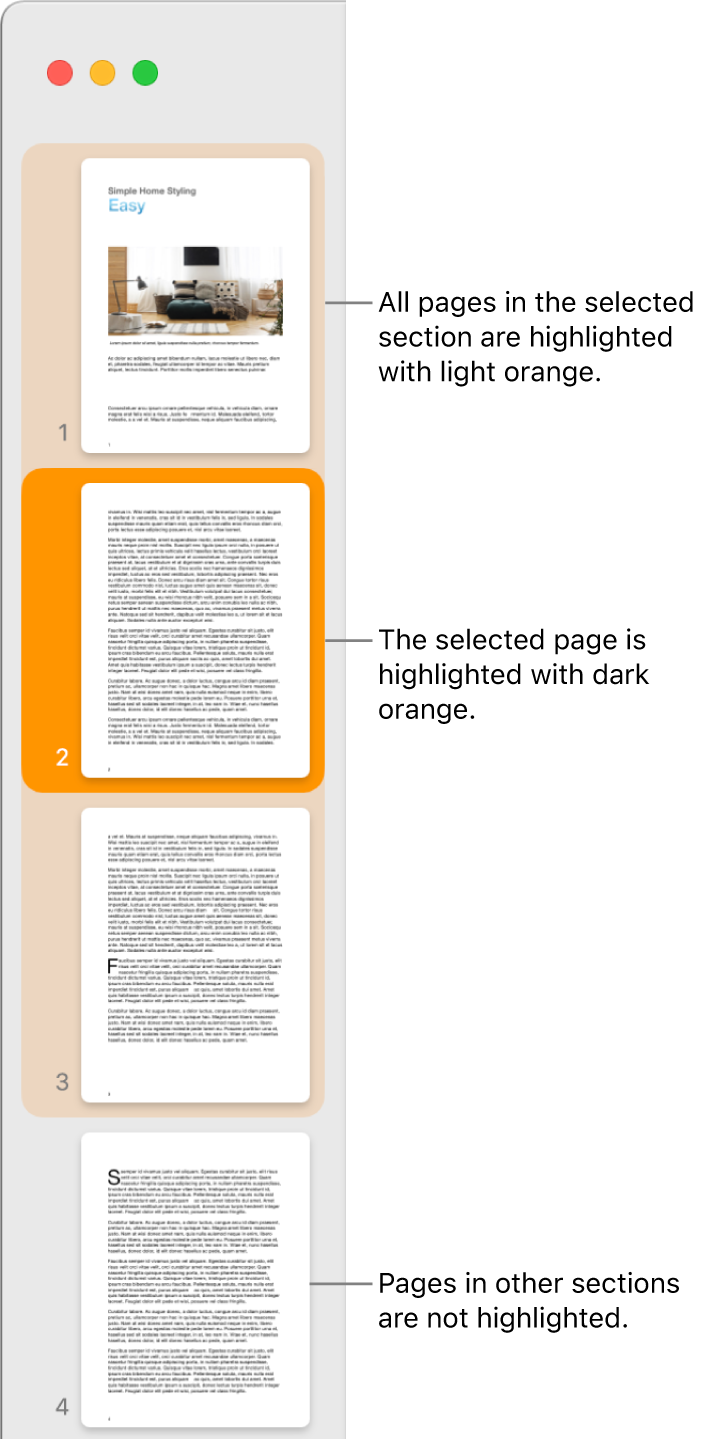
After you add a new section, you can format it. You can also see which pages belong to a section in Page Thumbnails view.
Start a new section at the insertion point
You can add a new section anywhere you place the insertion point. If the insertion point is at the start of a paragraph, for instance, that paragraph moves to a new page that begins the new section. This effectively divides the current section into two sections.
Place the insertion point where you want a new section to appear.
Click
 in the toolbar, then click Section Break.
A new page is added after the insertion point and begins a new section.
Start a new section at the top of the current page
You can add a new section that begins with the content on the current page (as long as it’s not the first page of the document or section). This effectively divides the current section into two sections.
In Page Thumbnails view, select the page you want to make the start of a new section.
Open the Document sidebar, then click the Section tab at the top.
Click the “Create a new section” pop-up menu, then choose “Starting with this page”.
If “Starting with this page” is dimmed, make sure you haven’t selected the first page of the document or section. To add a new section at the beginning of a document or section, you need to place the insertion point at the beginning of the document or section, then add a section as described in the previous task.
Add a blank section after the current section
In Page Thumbnails view, select any page in a section.
Open the Document sidebar, then click the Sections tab at the top.
Click the “Create a new section” pop-up menu, then choose “After this section”.
The new section appears after the current section.
Format a section
When you change the background, headers, footers and page numbering style for a section, the changes apply to all pages in the current section.
In Page Thumbnails view, select any page in the section you want to format.
Open the Document sidebar, then click the Section tab at the top.
To change the background colour for the section, click the colour well next to Background, then choose a colour.
You can also add an image, custom colour or gradient (two colours that blend into one another) to the background. For more information, see Change the page background in Pages on Mac.
To choose header and footer options, below Headers & Footers, do any of the following:
Show headers and footers on all but the first page of the section: Select the “Hide on first page of section” tick box.
Use different headers and footers on left and right pages (for documents with facing pages): Select the “Left and right pages are different” tick box.
Use different page numbers, headers or footers from the previous section: Deselect the “Match previous section” tick box.
To choose how page numbers appear, below Page Numbering, do any of the following:
Choose the numbering format: Click the Format pop-up menu, then choose an option.
Continue page numbers from the previous section: Select “Continue from previous section”.
Choose the page number you want to start the current section with: Select “Start at”, then enter the page number you want this section to start with (or click the up or down arrows).
If the document is set up to use facing pages, click the pop-up menu to the right of “Section starts on”, then choose an option to determine where the section content starts:
Next Page: Starts the section on either a left or right page, whichever comes next in the document. If you don’t want your document to include blank pages, choose Next.
Right Page: Starts the section on the first right page. If the next page in your document would be a left-side page, a blank page is inserted before the start of the section on the right.
Left Page: Starts the section on the first left page. If the next page in your document would be a right-side page, a blank page is inserted before the start of the section on the left.
View a document’s sections
By default (unless you start with a template that already has multiple sections), all pages in a word processing document are part of the same section until you choose to add additional sections. You can see which pages in a word processing document belong to a particular section in Page Thumbnails view.
Click
 in the toolbar, choose Page Thumbnails, then click a page thumbnail in the sidebar. A background colour appears behind all other pages in the same section.
Adding sections to a word processing document can also make it easier to rearrange, duplicate or delete specific portions of content. See Rearrange pages or sections in Pages on Mac, Duplicate pages or sections in Pages on Mac or Delete pages or sections in Pages on Mac.
