Install Expansion Cards on Mac Pro
You can configure your Mac Pro by installing additional cards in the PCI Express expansion slots.
All slots are connected through a PCI Express switch on the Mac Pro main logic board. PCI Express switch bandwidth is automatically configured through pool allocations. You can use the Expansion Slot Utility to manually configure pool allocations. For more information about the Expansion Slot Utility, see the Apple Support article Install PCIe cards in your Mac Pro.
For optimal performance, use any slot that has at least as many lanes as the card in use. See the table below for details.
MPX Modules from the Intel-based Mac Pro are not supported in Mac Pro with Apple silicon.
Note: If you have a Mac Pro rack workstation, see Install Expansion Cards in Mac Pro (Rack).
Slot | Number of lanes | Supported PCI Express performance |
|---|---|---|
Slot 7 | x4 (Preinstalled with the Apple I/O card) | PCIe 3.0 |
Slot 6 | x8 | PCIe 4.0 |
Slot 5 | x8 | PCIe 4.0 |
Slot 4 | x8 | PCIe 4.0 |
Slot 3 | x8 | PCIe 4.0 |
Slot 2 | x16 | PCIe 4.0 |
Slot 1 | x16 | PCIe 4.0 |
Mac Pro has four double-wide slots and three single-wide slots, which can be customized with cards to expand Mac Pro capabilities. Slot 7 is preinstalled with the Apple I/O card, but this card can be removed in order to install other PCIe cards.
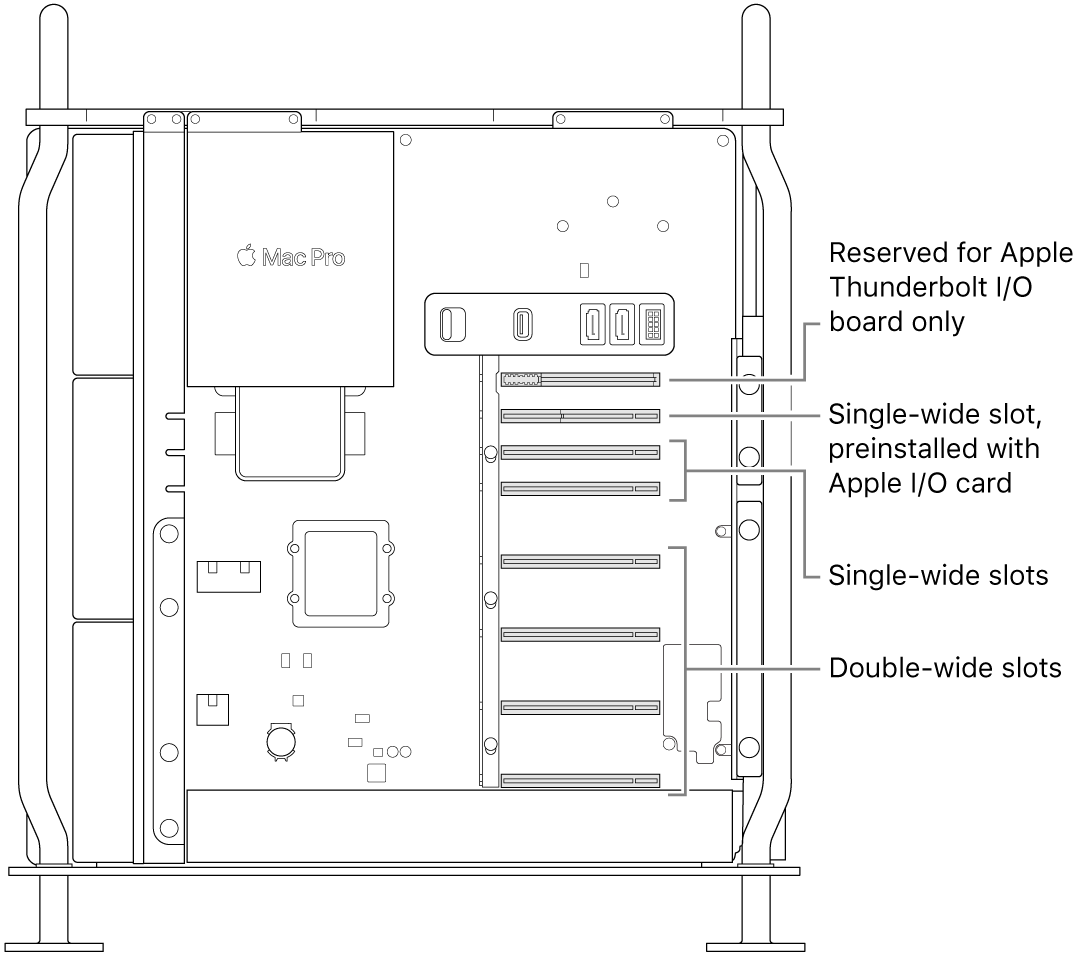
WARNING: For optimum ventilation, space cards out as you install them. If you remove a card and don’t install a replacement, place a port access cover over the empty slot to keep foreign objects out of the enclosure. An uncovered slot may cause damage by affecting the airflow that cools the internal components.
Important: Connect cards to the appropriate power source, as illustrated below. Only use cables sold online at apple.com or at an Apple Store, or cables that come with compatible third-party PCIe cards.
Take care when connecting to the AUX connectors. When installing an accessory into your system that uses AUX power, first attach the AUX connector, then install the module. Be careful not to drop the module while connected to the AUX connector, as doing so may result in damage to the AUX connector or logic board. If the AUX connector becomes damaged, don’t turn on your computer because doing so may further damage it. For more information about repairing your Mac Pro, see Important safety information for your Mac.
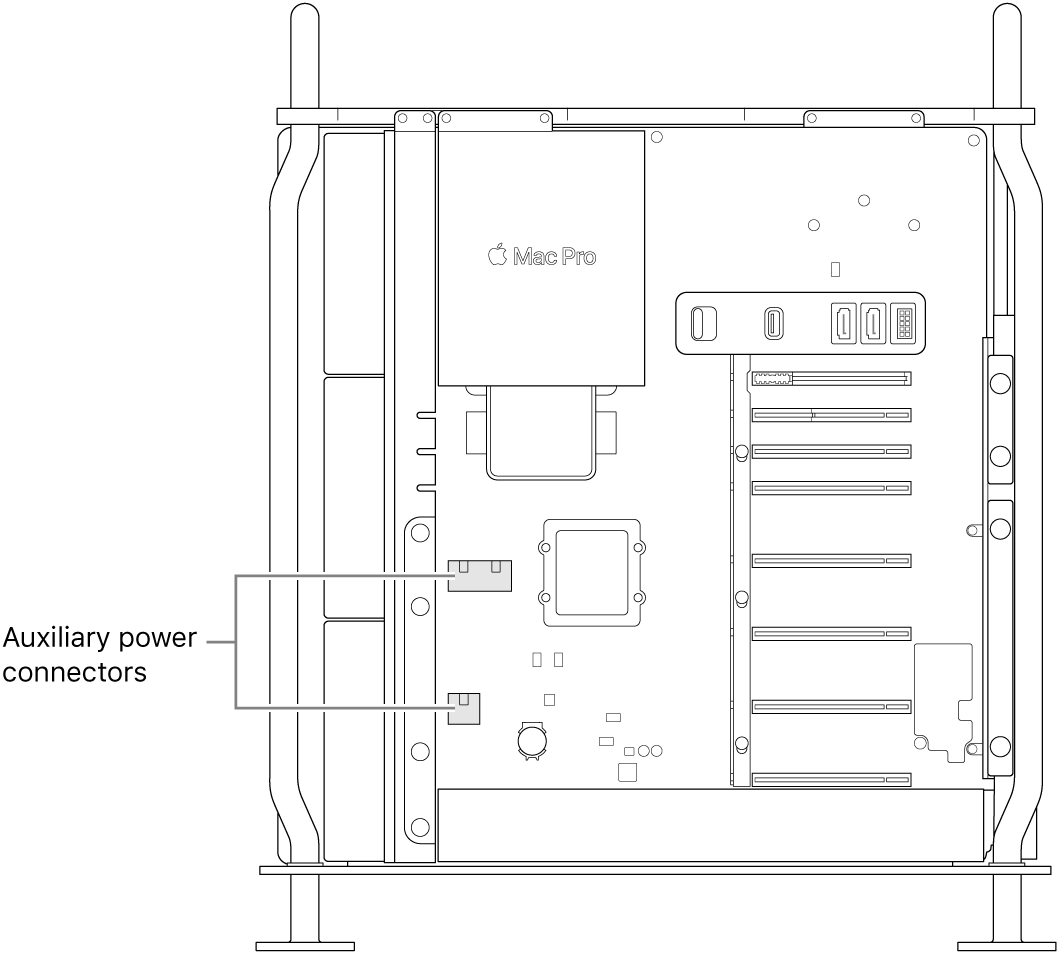
Follow these steps to install expansion cards in your Mac Pro.
Turn off your Mac Pro by choosing Apple menu

Let it cool down for 5 to 10 minutes before you touch the internal components, which may be hot.
Disconnect all cables except the power cord from your Mac Pro.
Touch the metal on the outside of your Mac Pro to discharge any static electricity.
Note: Always discharge static before you touch parts or install components inside your Mac Pro. To avoid generating static, don’t walk around the room until you finish installing the expansion cards.
Disconnect the power cord.
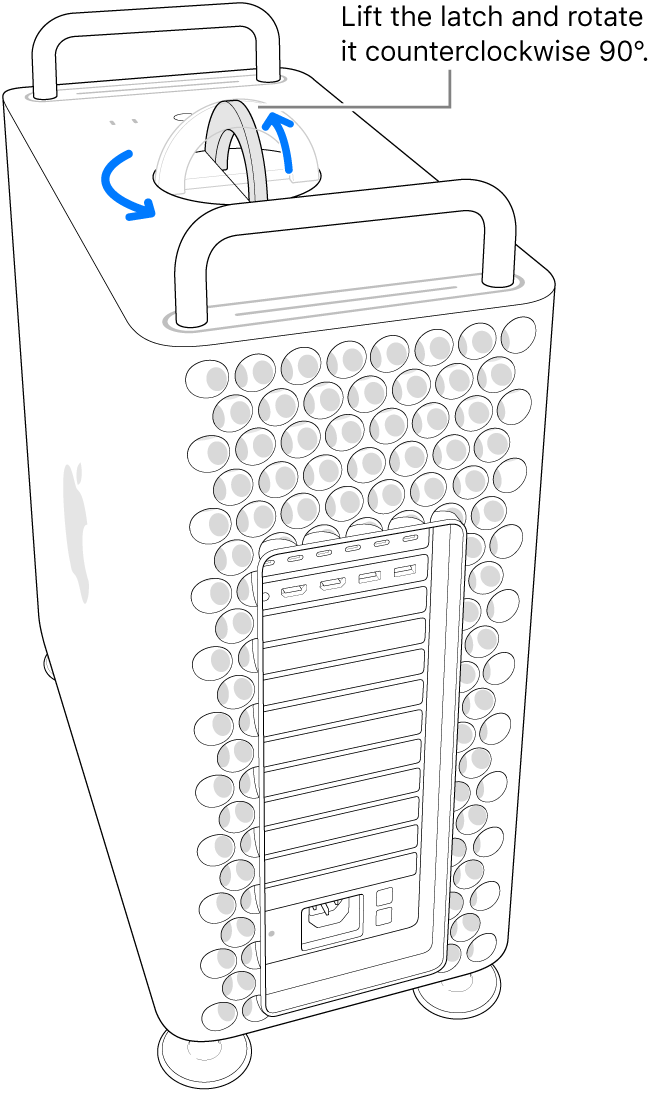
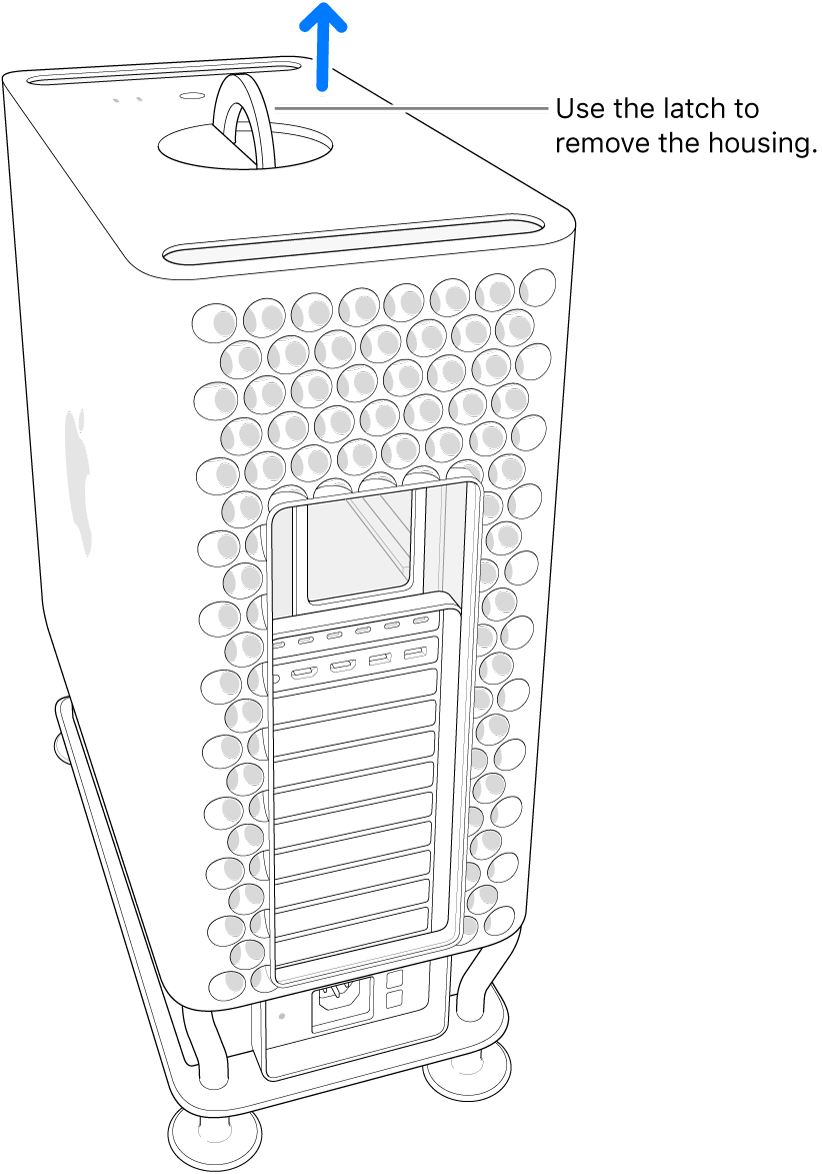
Unlock the computer’s housing by rotating the latch counterclockwise 90 degrees.
WARNING: Do not rotate the latch while the computer is turned on; doing so may cause the computer to shut down.
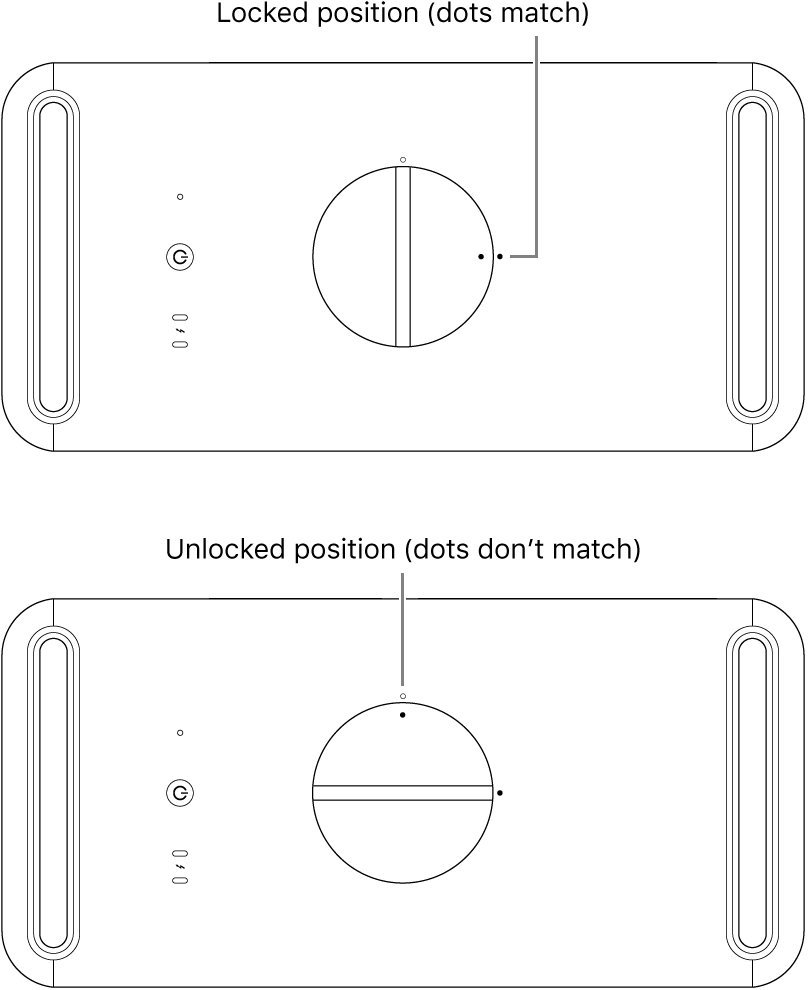
Remove the computer’s housing by pulling it up by the latch.
Note: Mac Pro can’t start up when the housing is removed.
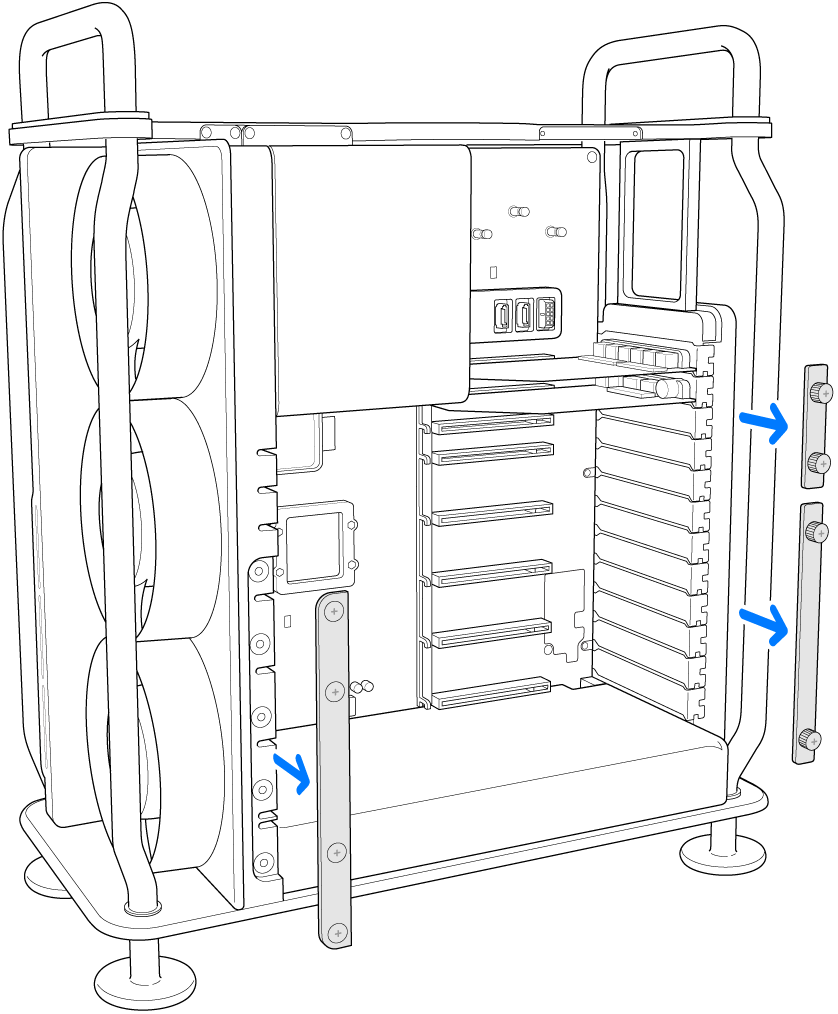
Remove the necessary side brackets.
If you’re installing a card into Slots, 1, 2, 3, or 4, remove the side bracket on the bottom-right.
If you’re installing a card into Slot 5, 6, or 7, remove the side bracket on the top-right.
If you’re installing a full-length card, remove the left side bracket.
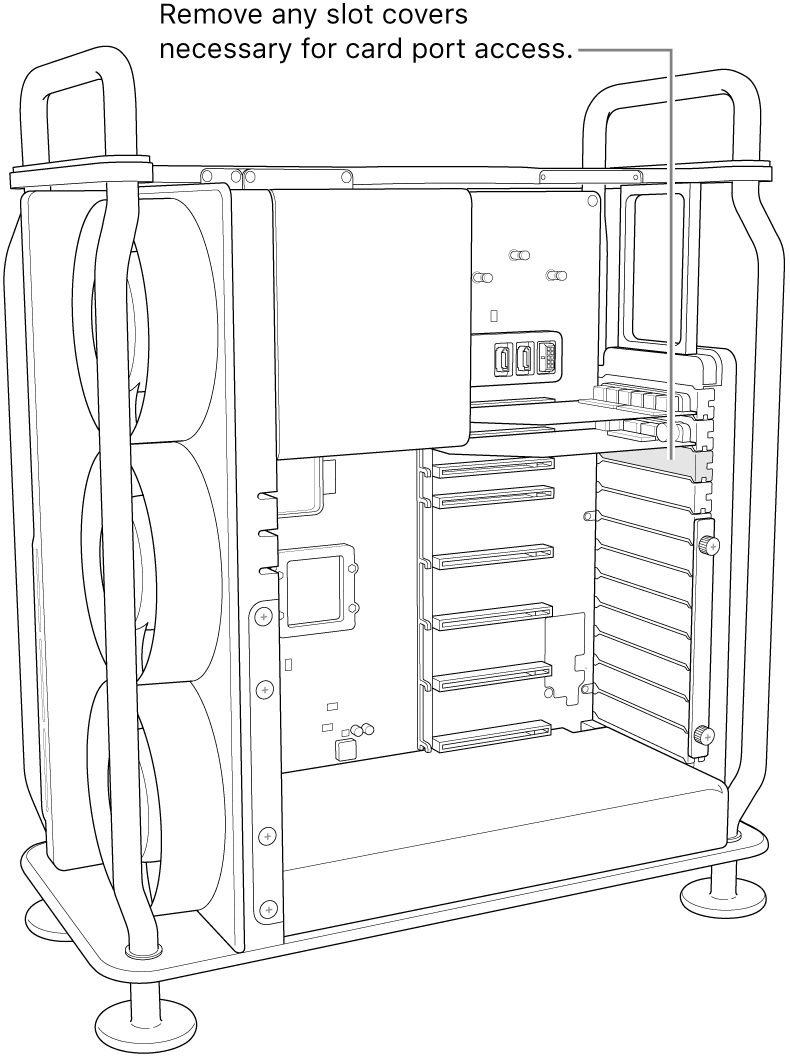
Remove the slot covers.
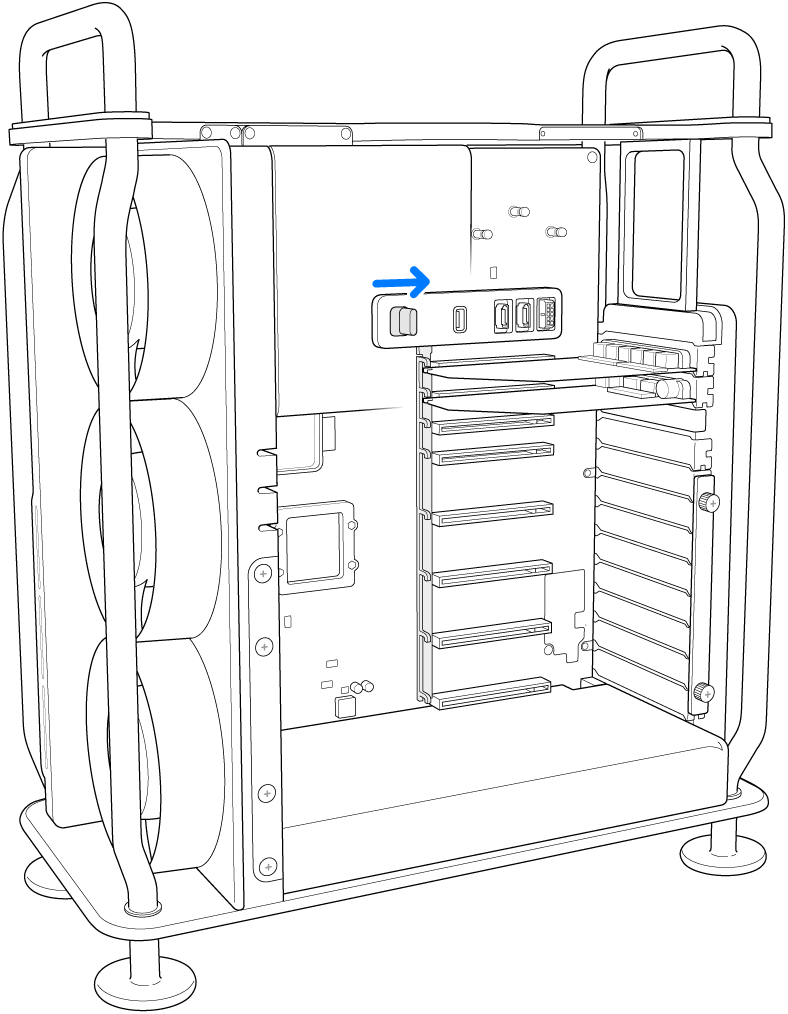
Slide the lock to the right.
Remove the new card from its static-proof bag and hold it by its corners. Don’t touch the gold connector or the components on the card.
Note: Apple recommends using only PCIe modules that are safety certified (CSA, UL, or equivalent) and specifically state that they are compliant with the industry standard PCIe specification.
Slide the card into place.
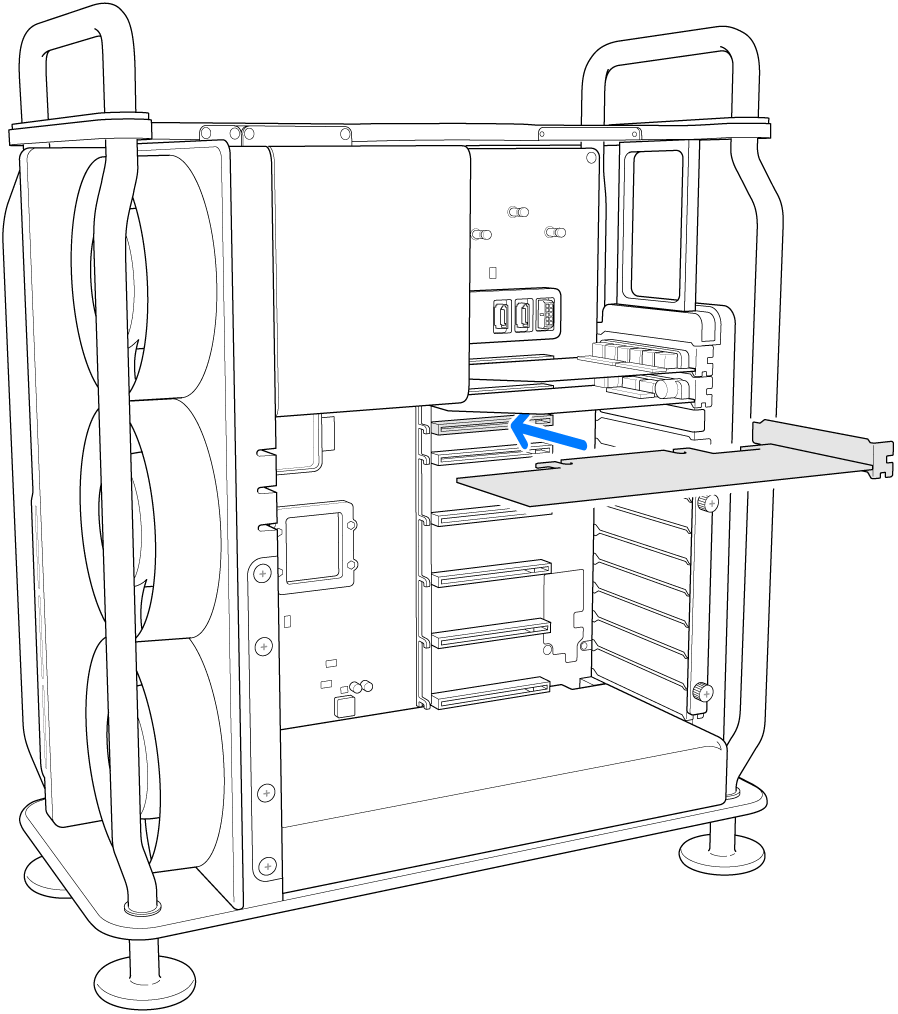
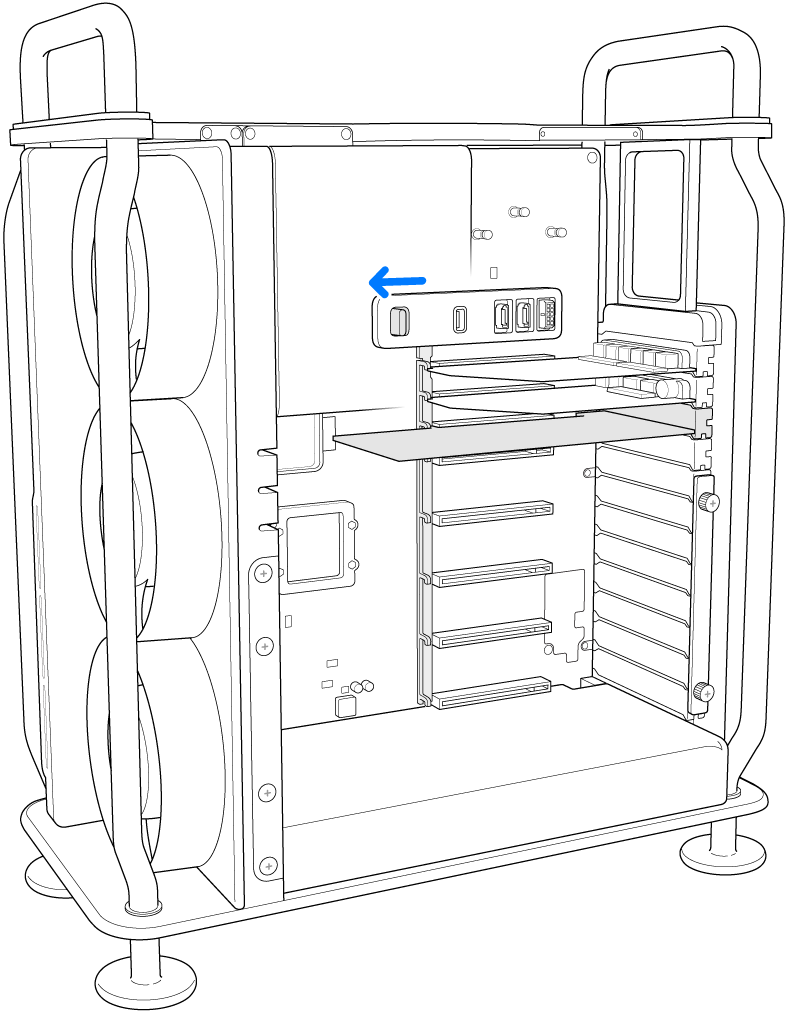
Slide the lock to the left.
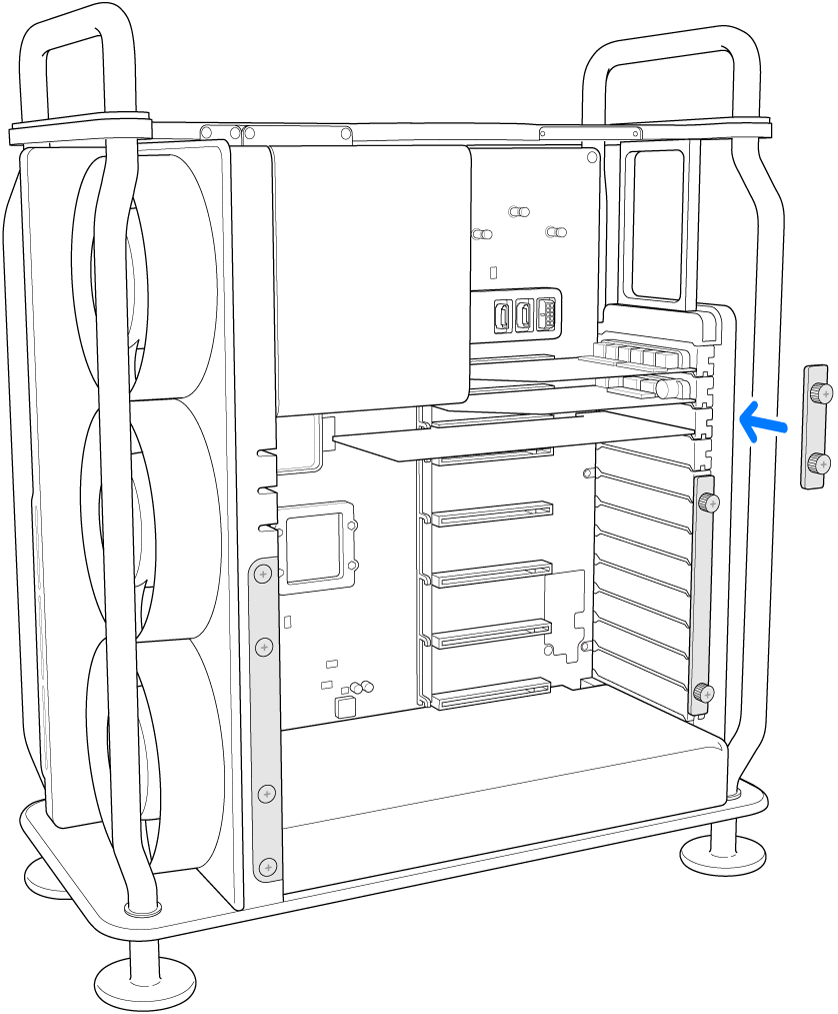
Reinstall the right side brackets. If you installed a full-length card and also removed the left side bracket, reinstall the left side bracket as well.
Replace the computer’s housing, then turn the latch clockwise 90 degrees to lock it.
Mac Pro can’t start up until the housing is replaced and the latch is rotated to its original position.
Reconnect all cables and the power cord to your Mac Pro.
