Use colors in documents on Mac
In most macOS apps, you can use the Colors window (or use the color controls in the Touch Bar) to change the color of text and objects in documents. You can also assign a color profile to a document, to ensure the colors you see onscreen are the ones used when the document is printed or viewed on another computer.

In an app on your Mac, press Shift-Command-C. Or, depending on the app, choose Format > Show Colors, Format > Font > Show Colors, or View > Show Colors.
Do any of the following:
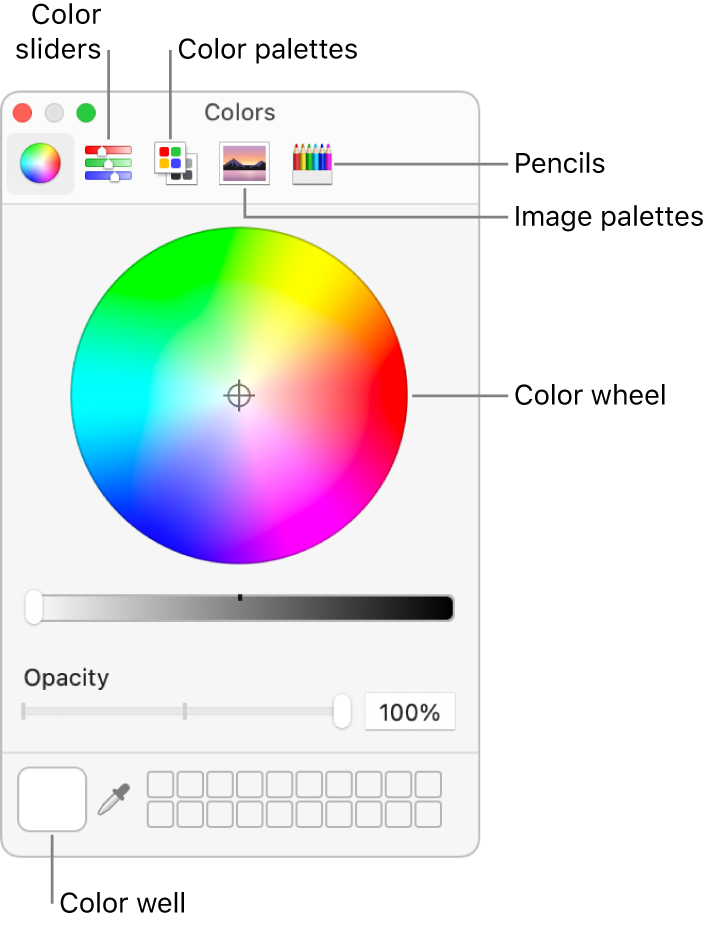
Choose a color for selected text or objects: Click a button at the top of the window to show the color wheel, color sliders, color palettes, image palettes, or pencils, then click a color. You can specify a more precise color by using the sliders or entering values.
Save colors to use again: At the bottom of the window, drag the color from the color well on the left to an empty well on the right. To remove a color, drag it to the Trash.
Assign a color profile: Click the Color Sliders button, then choose a slider (such as CMYK Sliders) from the pop-up menu. If necessary, adjust the colors by using the sliders or entering values. Then click
 next to the pop-up menu to choose a profile.
If your document’s colors don’t look right after assigning a profile, it might be that the app you’re using doesn’t recognize color profiles. Try assigning the generic version of the profile.
You can create your own custom color profiles using ColorSync Utility. See the ColorSync Utility User Guide.
